Standard IP Change replaces an existing VPS IPv4 with an address assigned randomly by the system. Choose this option when you do not need to select the new address yourself. For a choice from available addresses, use Bespoke IP Change.
The old IP stops working as soon as its replacement is assigned. Open the VNC console beforehand and be ready to update the operating system’s network configuration. Existing SSH, RDP and application connections to the old address will be interrupted.

Find Standard IP Change

In the EDBB Control Panel, choose Services → Order New Services → Product Addons. You can also open Product Addons directly.
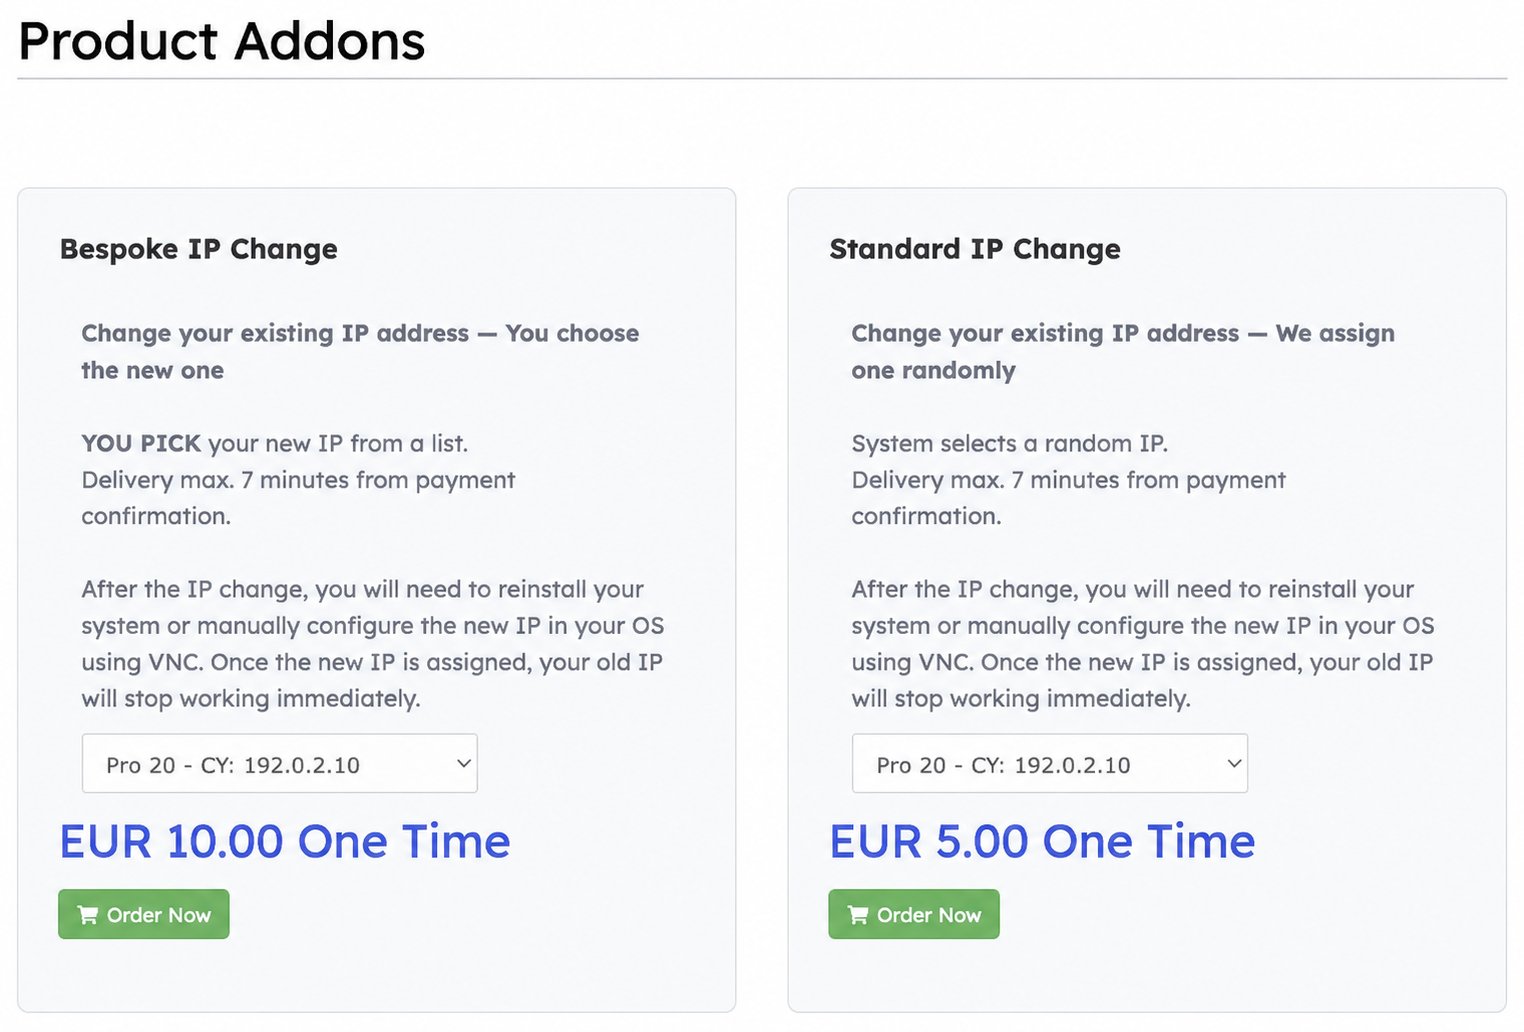
Product Addons with Bespoke IP Change on the left and Standard IP Change on the right

Choose Standard IP Change on the right for a randomly assigned replacement. Service addresses are examples.

The listed charge is EUR 5 one time. Check the order summary for applicable VAT and the final total before paying. This replaces an address; it does not add another IPv4 to the VPS.

Select the VPS and old address

1

Choose the service

In the Standard IP Change card, select your VPS from the dropdown. Check the plan, location code and current address, then click Order Now to add the change to the cart.
2

Select Old IP

On Review & Checkout, choose the existing address you want to replace in Select Old IP. This identifies the address being removed.
3

Review and check out

Verify the service, old IP and total, then click Checkout. Review your billing details, choose a payment method, review the terms and complete the order when ready.
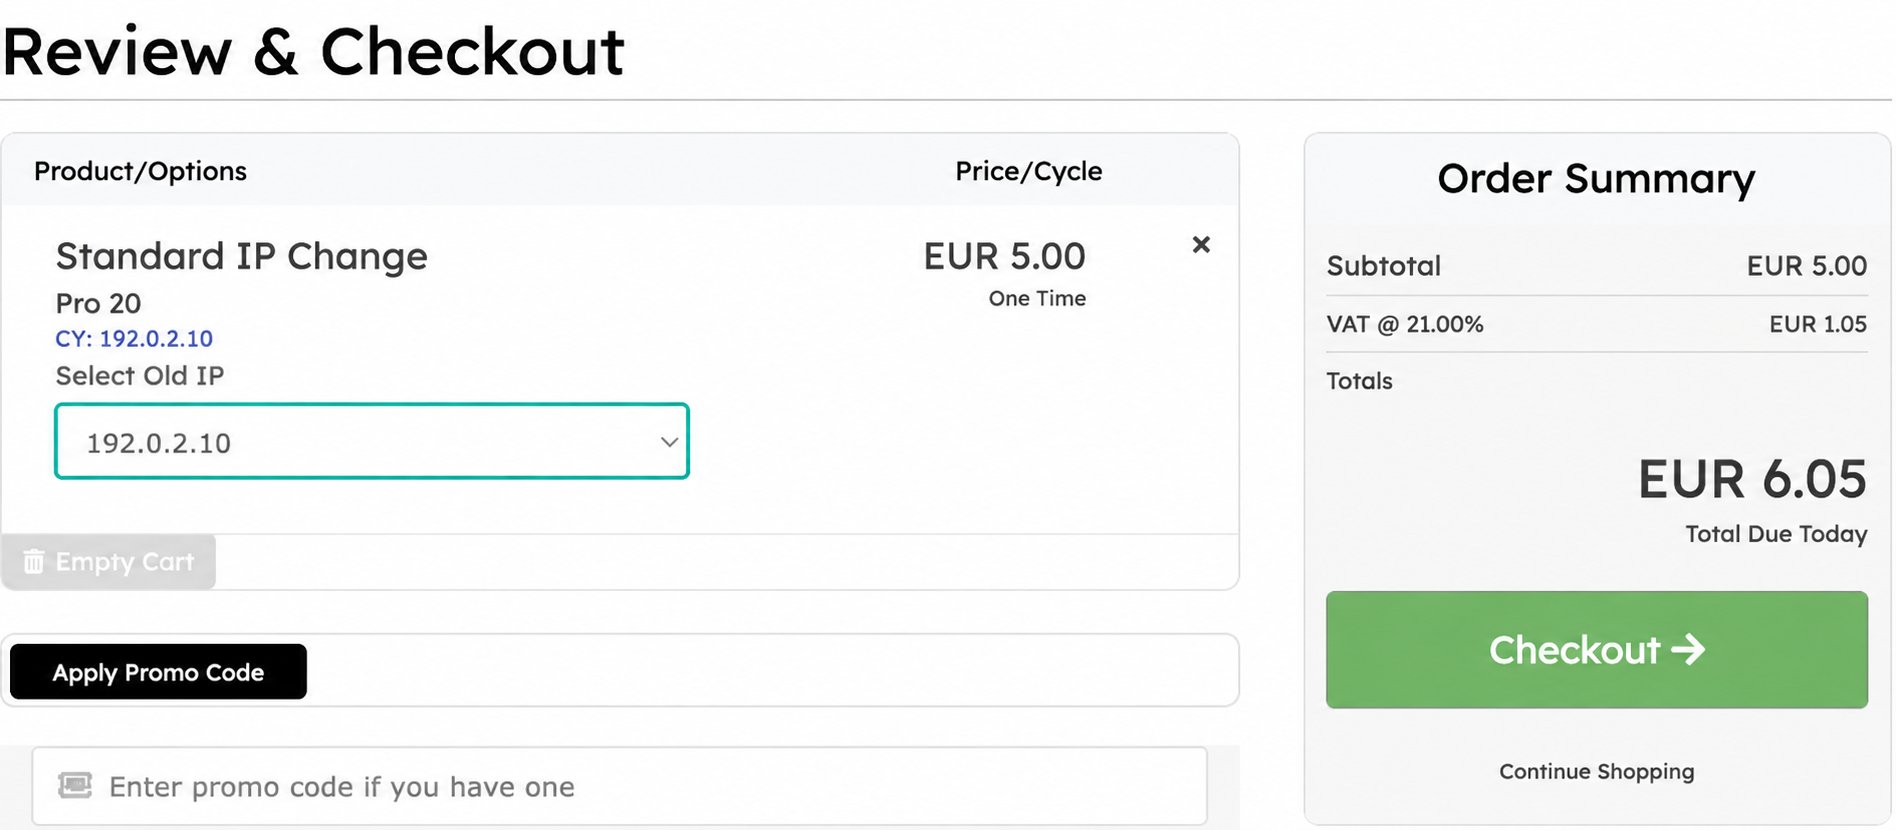
Standard IP Change review with Select Old IP highlighted and the order summary

Standard lets you select the old IP; the system assigns the replacement. The example total includes 21% VAT; your tax treatment may differ.

There is no Select New IP field for Standard. You cannot request a particular replacement or guarantee a different subnet through this option. Adding the item to the cart alone does not complete the order.

After the replacement

The EDBB add-on page states delivery within seven minutes of payment confirmation. Check the assigned address and network settings in your VPS’s Network tab. Use VNC to configure the replacement in your operating system. Follow the Ubuntu IP-change guide or Windows IP-change guide where applicable. Update DNS records, firewall allowlists, VPN endpoints and saved connections that use the old IP, then verify access through the replacement.
Reinstall only if you deliberately want a fresh system. Reinstallation erases the VPS disk; changing the network configuration manually preserves the installation.
An IP replacement does not guarantee access from a particular country, ISP or website, or a particular reputation or geolocation result. For the one-time free change available during the first 24 hours, see Change your VPS IP address.