

NOTE: To fully apply your upgrade, first shut down your OS, power off the server from the Control Panel, and then power it back on through the Control Panel. This process ensures the system recognizes the updated drive specifications.Keep in mind, the additional space will remain unavailable until you resize your disk or partition. Do not format the existing volume when your intention is to extend it.
How to Resize a Hard Drive
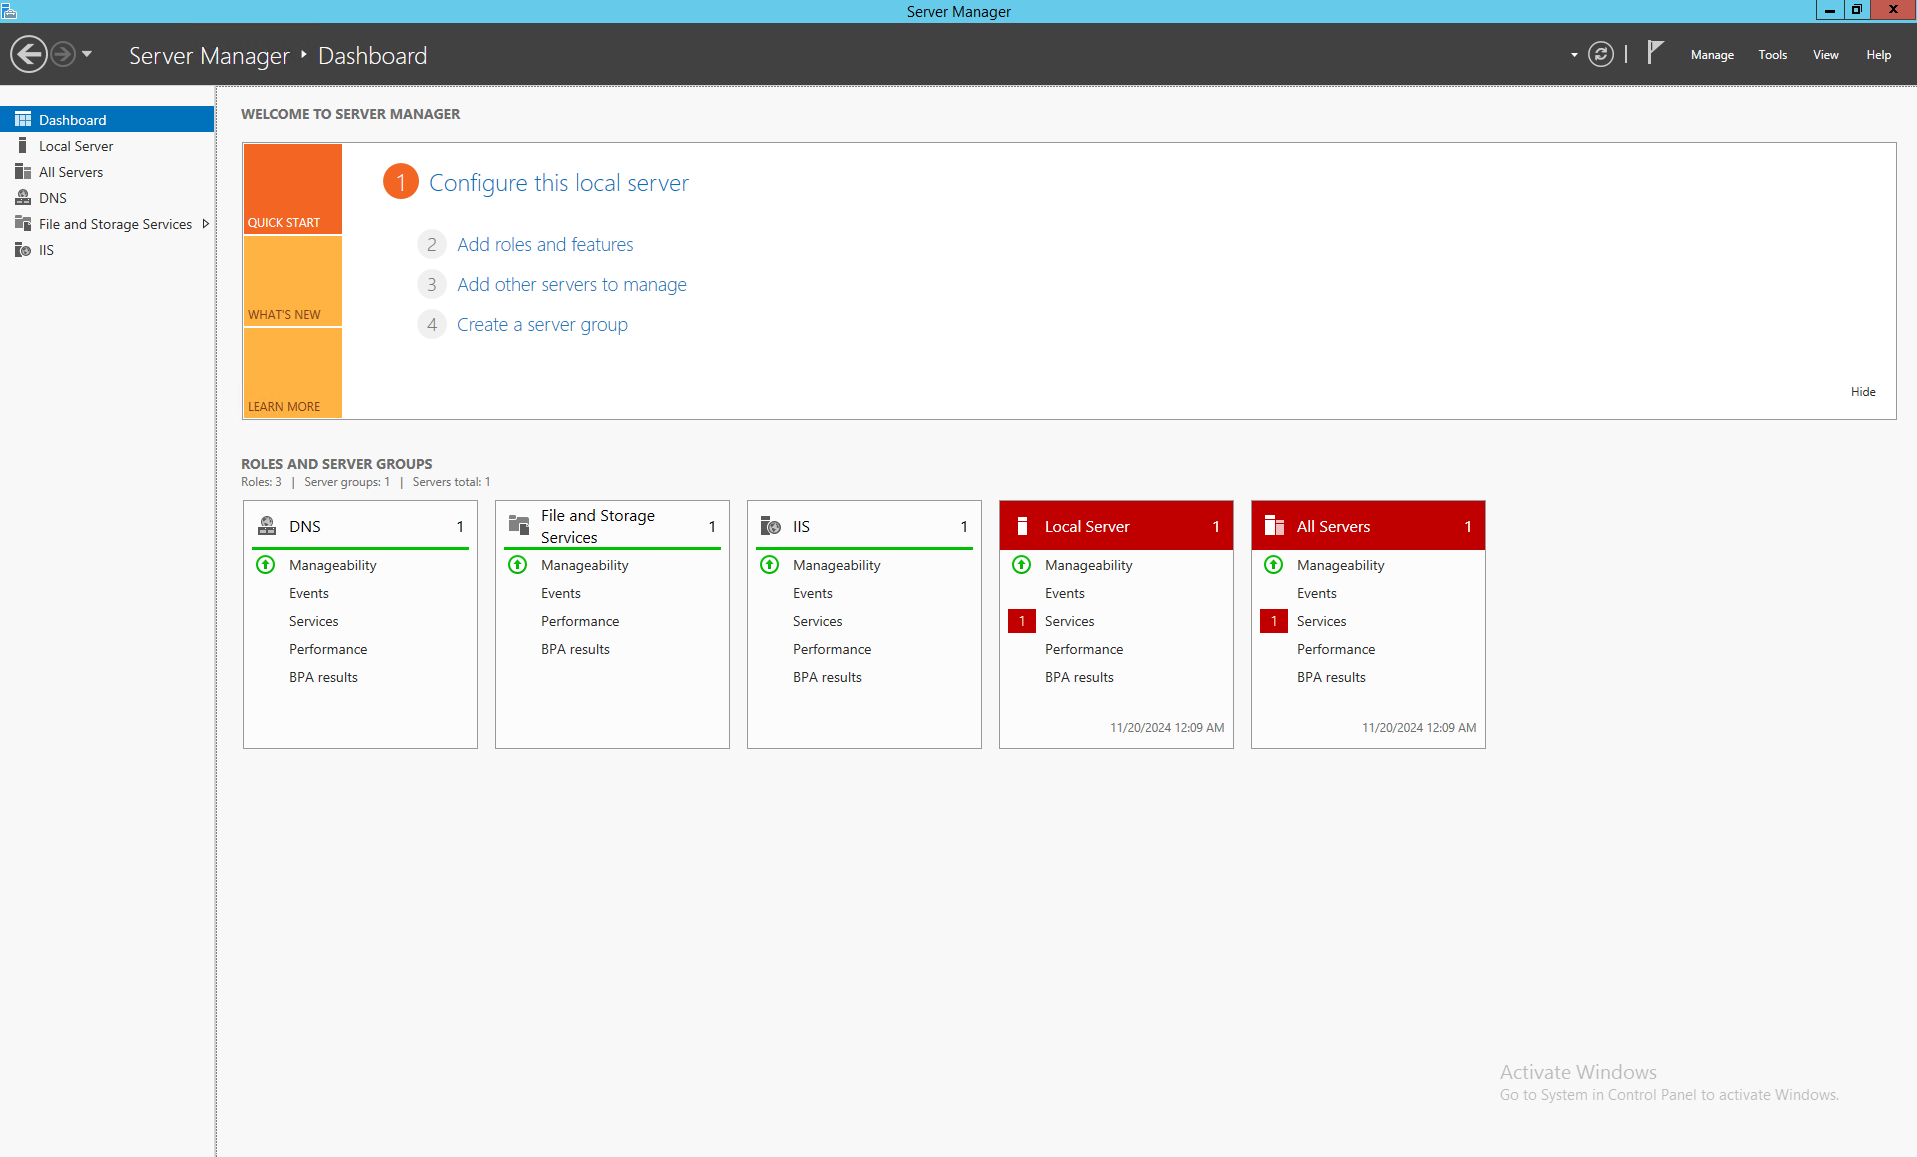
Step 1: Accessing Server Manager
- Log in to the Server: Access your server via Remote Desktop or the local console.
- Open Server Manager:
- Click on the Start button and select Server Manager.
- If it doesn’t open automatically, search for
ServerManager.exeand run it.
Step 2: Navigate to File and Storage Services
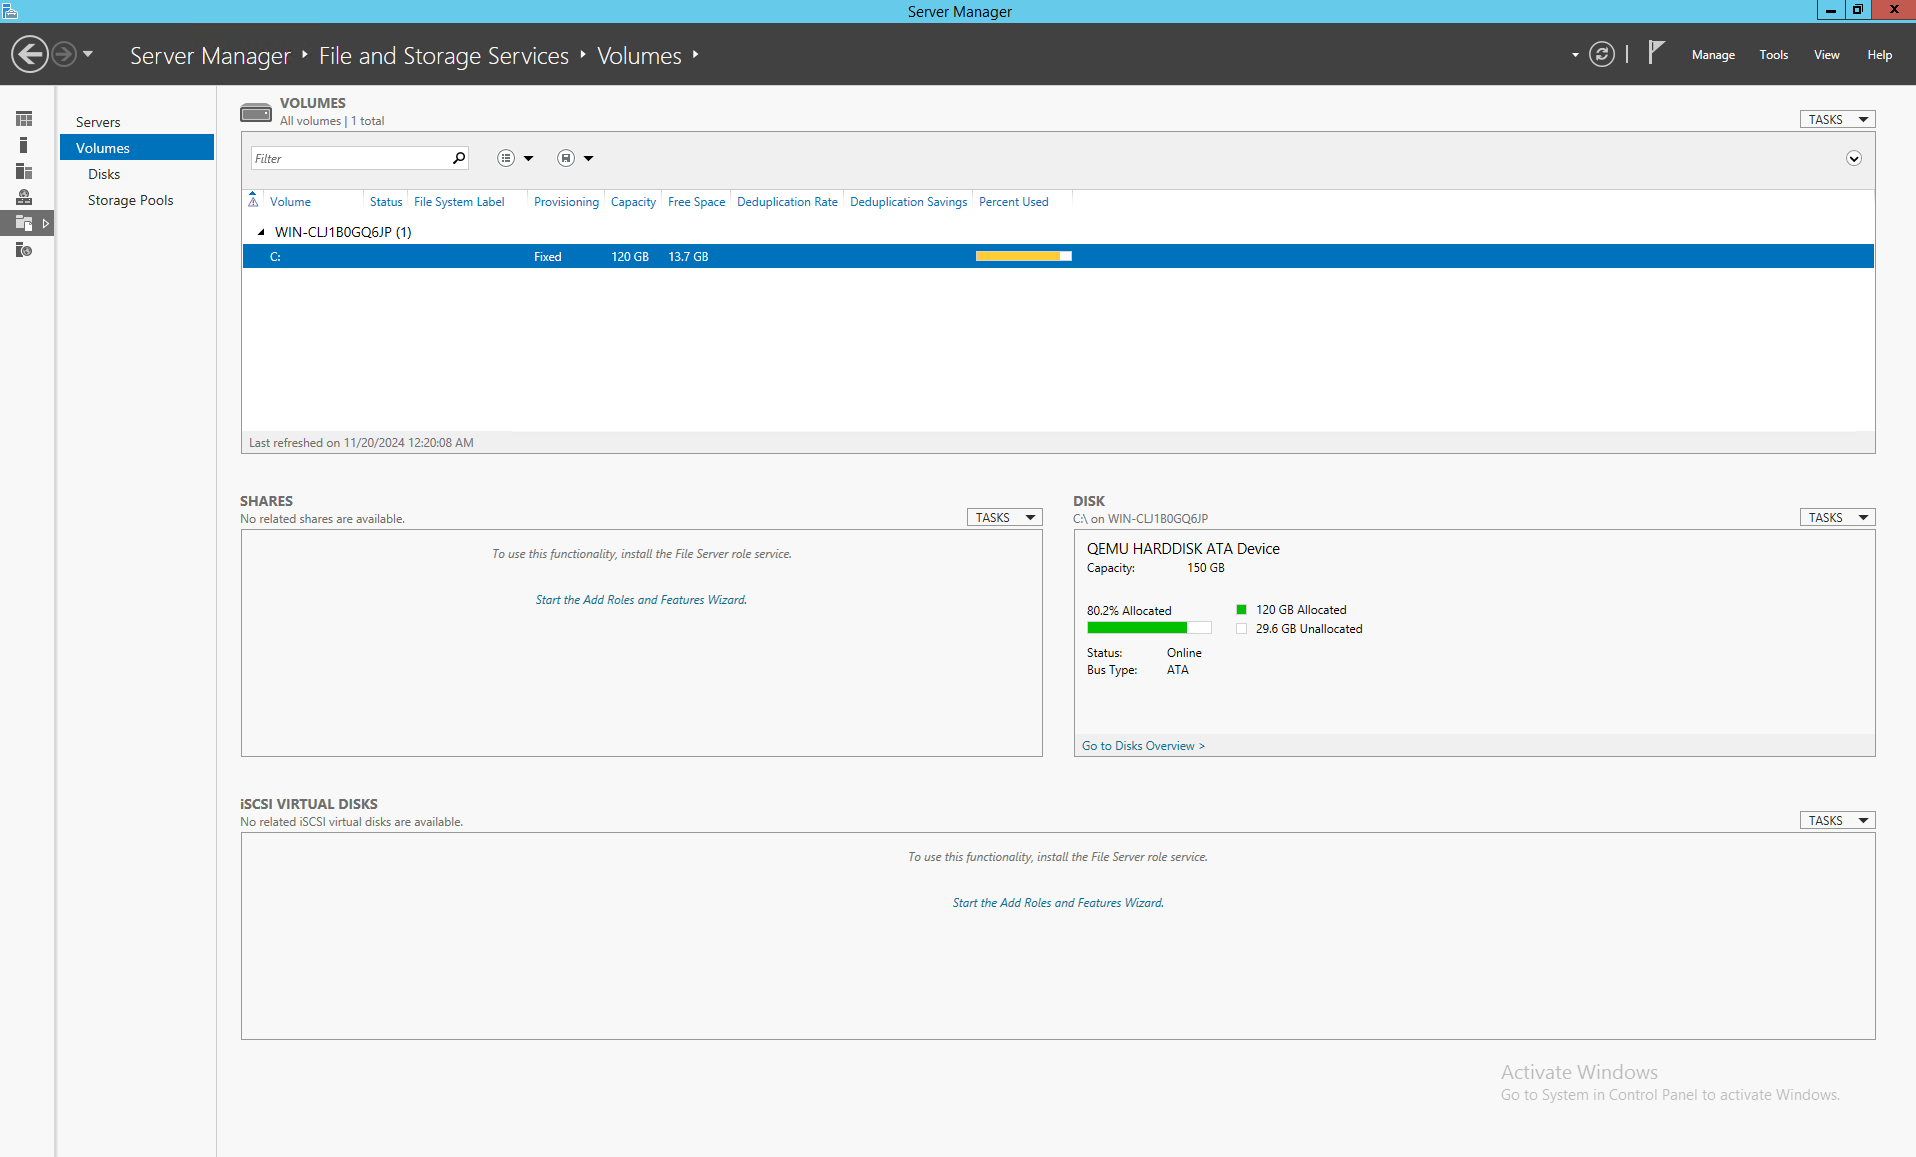
- In the Server Manager dashboard, select File and Storage Services from the left-hand panel.
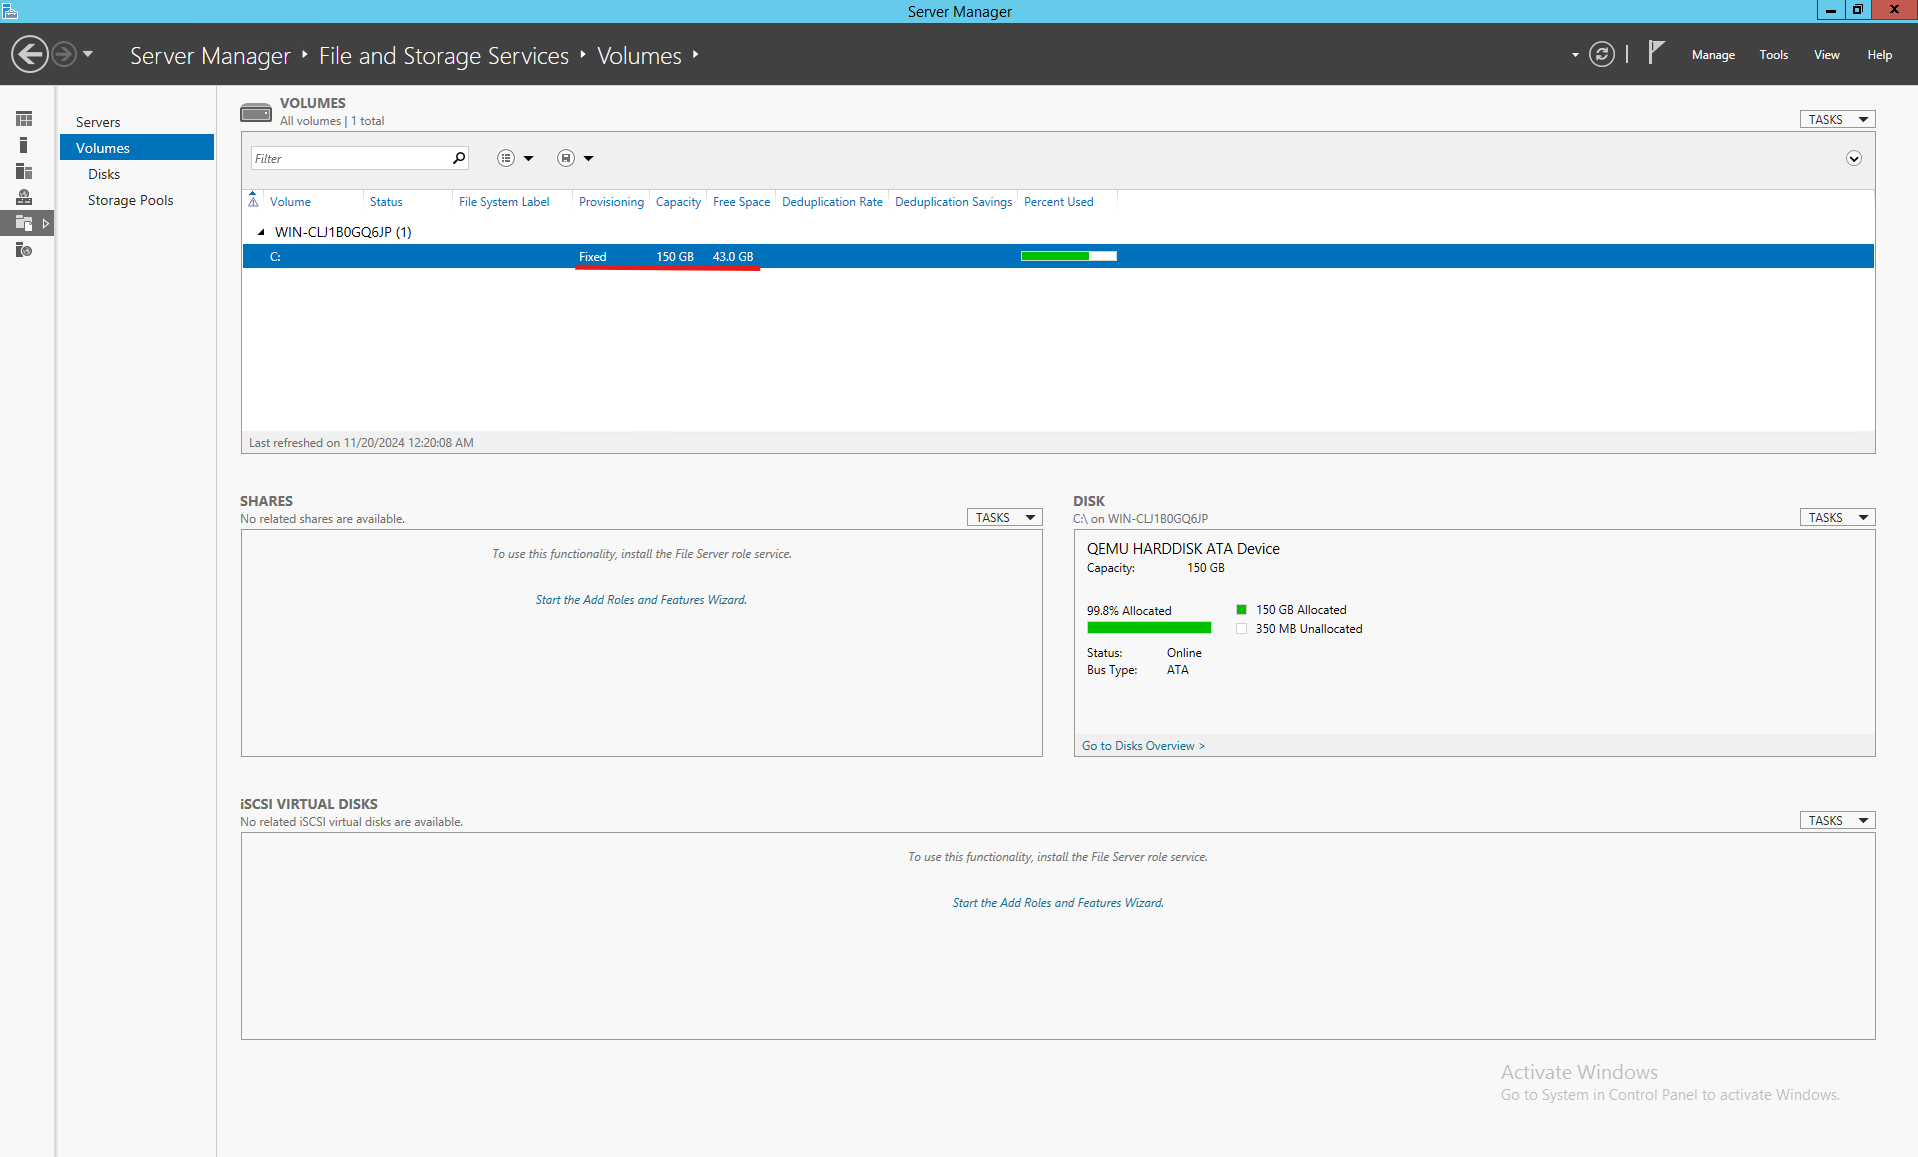
- Click on Volumes to display all configured drives on your server.
Step 3: Select the Target Volume
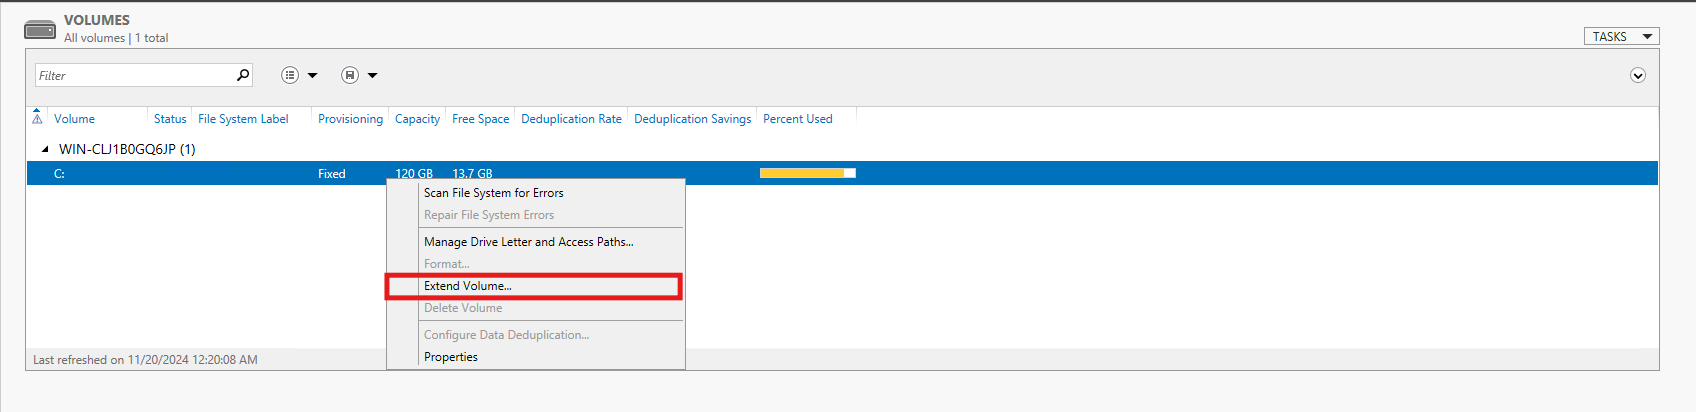
- In the Volumes section, locate the drive you want to resize.
- Right-click the drive and choose:
- Extend Volume to increase its size.
Step 4: Extending a Volume
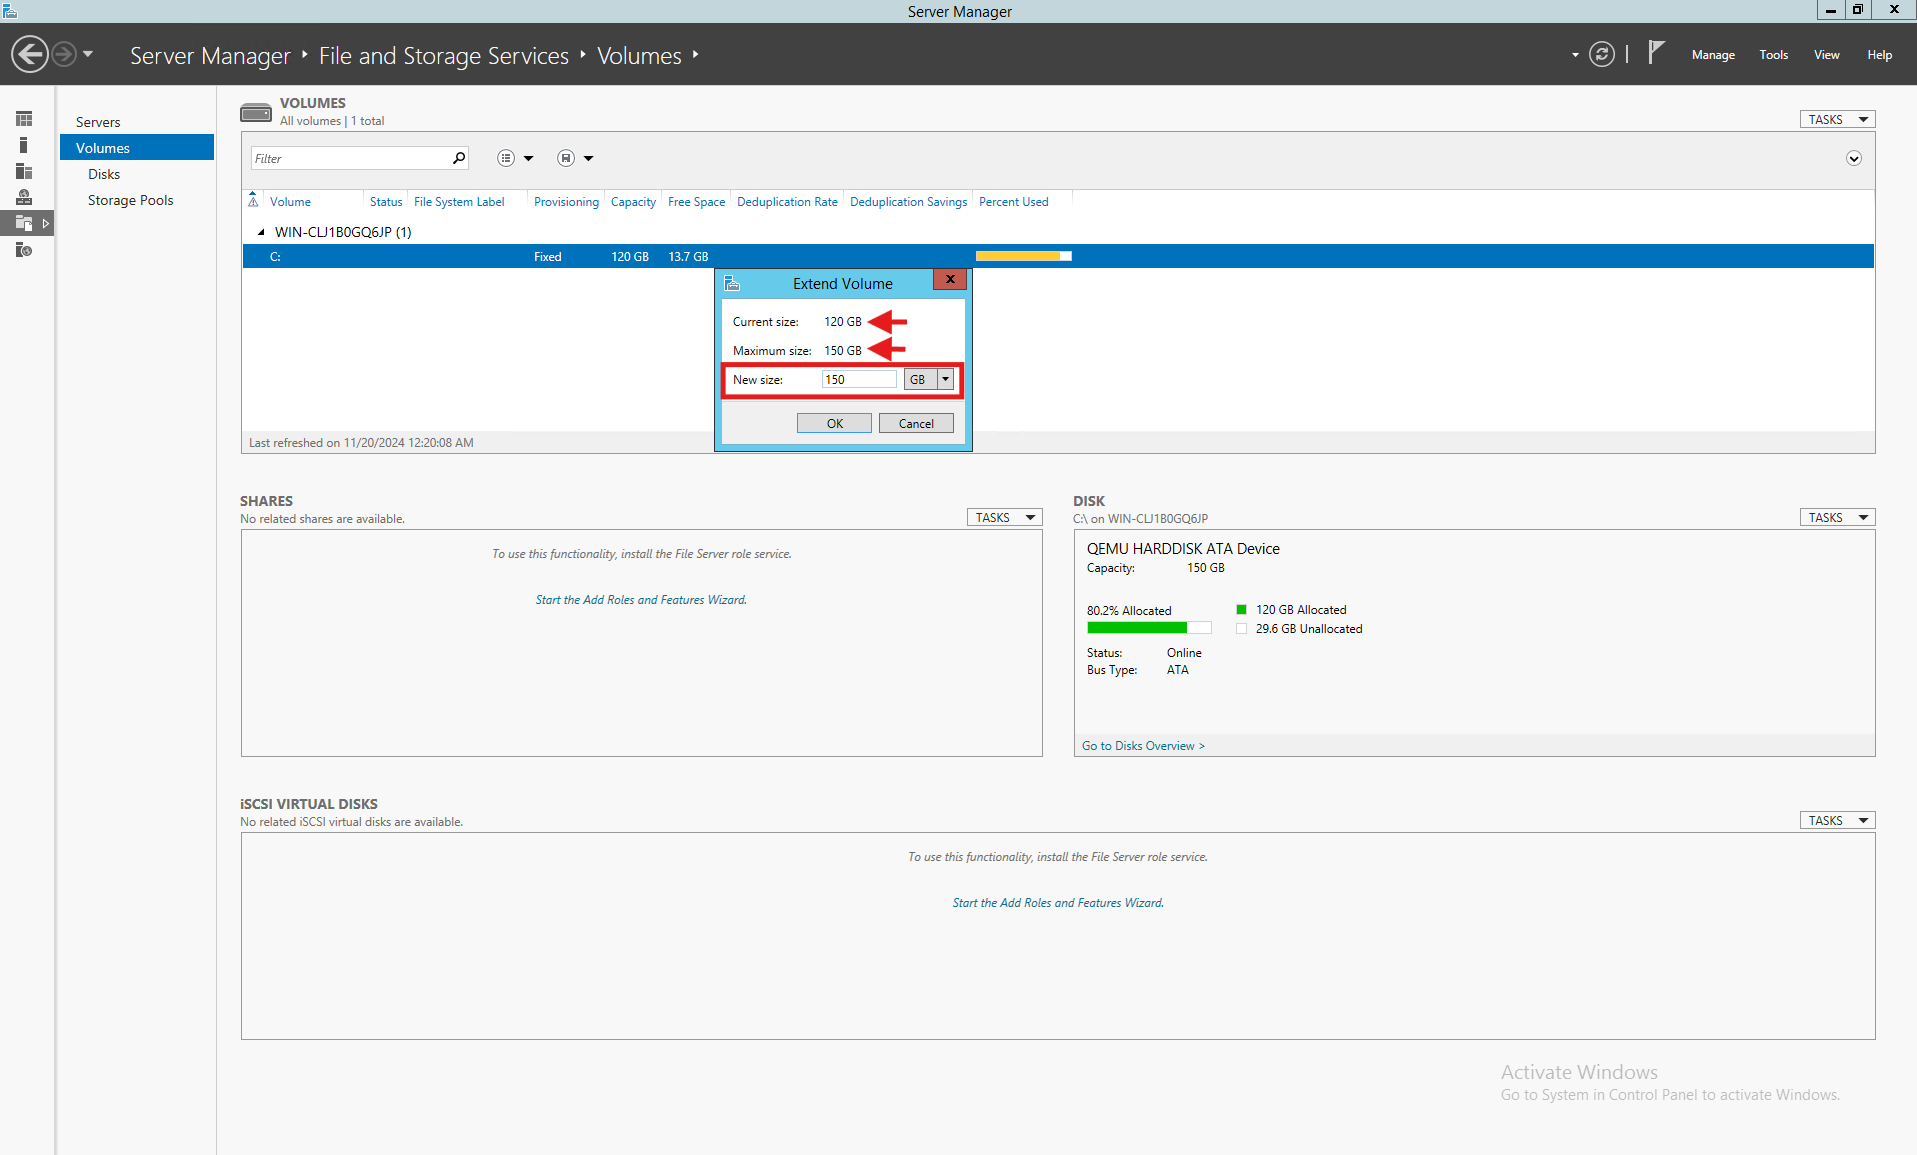
- If there’s unallocated space available on the disk:
- Selecting Extend Volume will launch a wizard that allows you to allocate the unused space to the volume.
- Specify the amount of space to add to the volume.
- Click OK to apply the changes.
Step 5: Verify changes
- Return to the Volumes section in Server Manager to confirm the updated volume size.
- For a more detailed view, you can use Disk Management.
Important Notes
- Backup Data: Always back up important data before making any changes to the disk.
- Unallocated Space Requirement: To extend a volume, unallocated space must exist on the same disk and be contiguous with the target volume.
- In-Use Volumes: If the volume is in use by active services or applications, a restart may be required.