System Configuration Overview
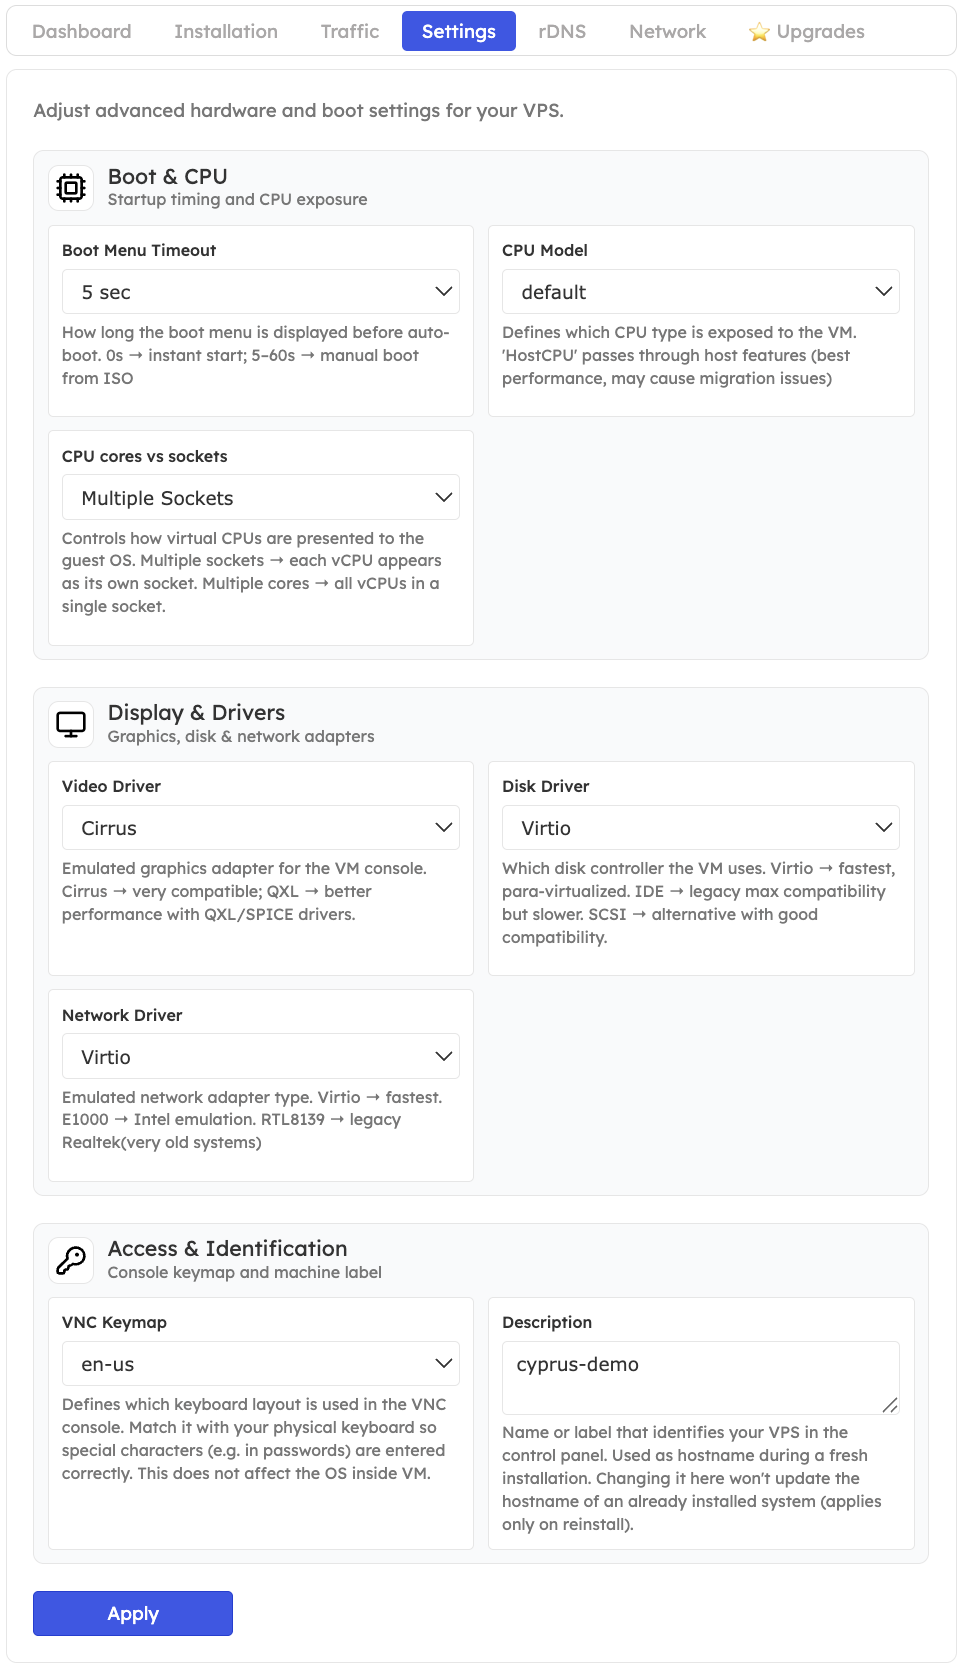
The System Configuration dialog controls how the hypervisor presents hardware to your VPS. Changes typically require a reboot—save your work before applying them.
Accessing the Dialog
Open the service Control Panel
Sign in to the EDBB Control Panel, open Services, and select the VPS you want to adjust.
Key Settings
⏲️ Boot Menu Timeout
Controls how long the boot menu appears at startup. 5 seconds offers a brief window to select alternate boot devices.
🧠 CPU Layout
Choose how virtual CPUs are exposed—Multi-Core for efficiency, or Multi-Socket if legacy software requires it.
🧩 CPU Model
Set Host CPU Passthrough to expose advanced instruction sets unless an OS needs a more generic model.
🖥️ Video Adapter
Pick Cirrus for broad compatibility or QXL if you use SPICE-aware systems and need smoother graphics.
💾 Disk Driver
Virtio delivers best performance (Windows may need drivers). Use IDE for legacy guests or RouterOS.
🌐 Network Driver
Choose Virtio for high throughput, E1000 for broad compatibility, or RTL8139 when legacy OS support is required.
⌨️ VNC Keymap
Match the console keyboard layout (e.g., en-us, de, fr) to your physical keyboard.
📝 Description
Add a friendly label to help identify the VPS inside the client area (e.g., prod-web-fra).
🔒 VLAN Assignment
If Private VLAN is enabled, select the VLAN ID to place this VPS on an isolated network segment.
Apply Changes
Review and save
Adjust the relevant fields and click Apply. The dialog closes once the settings are stored.
Switching disk or network drivers can make the guest OS unbootable if drivers aren’t installed. Confirm driver support before applying changes.
