

The /48 setting does not give you the whole location’s address range. Use only your assigned allocation. You may configure up to 20 stable IPv6 addresses at the same time. Rotating or random-address IPv6 proxy services are prohibited by the AUP.
Find your IPv6 settings
Open Services → My Services, select your VPS, then open Network. The IPv6 Configuration section is below IPv4 Configuration.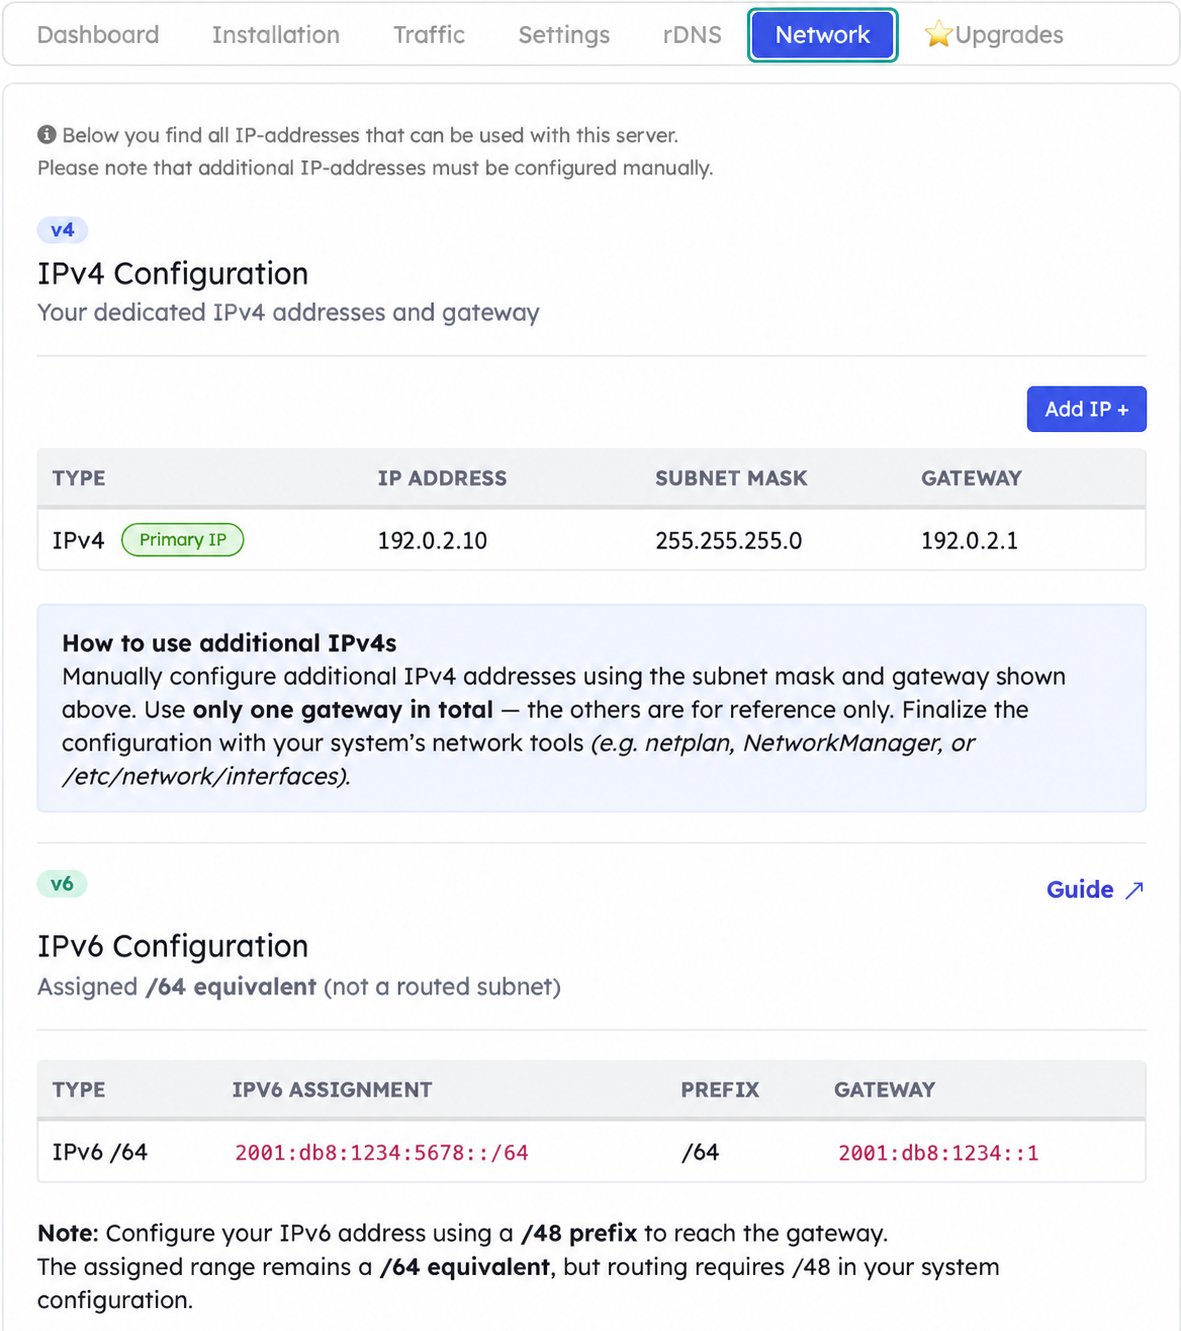
Open Network to find your assigned IPv6 range and gateway. Addresses shown are examples.
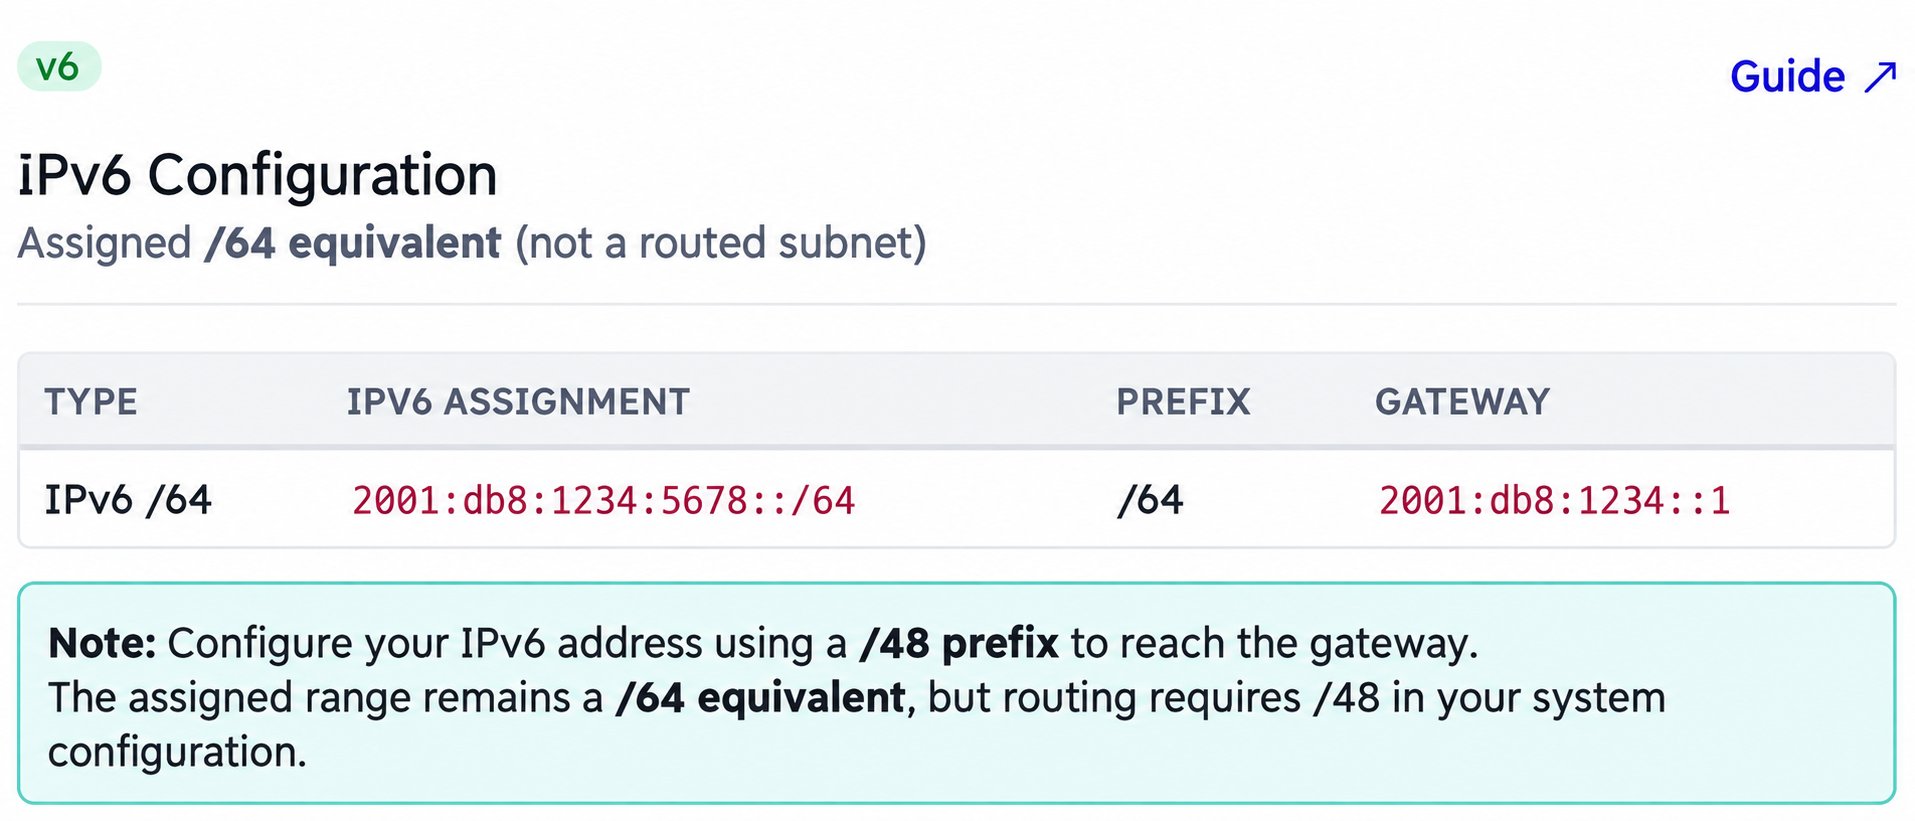
Your assigned range is /64 equivalent. Configure an address from that range with /48 to reach the gateway. Example addresses shown.
Open the VNC console before changing networking. The following examples use documentation addresses and
eth0. Replace them with an address from your allocation, your location’s gateway and the actual interface name. Check your IPv6 firewall rules as well; IPv4 rules do not automatically cover IPv6.
Test the settings on Linux
Check what is already configured:Keep the settings after a reboot
Temporaryip commands disappear after a reboot. Back up the configuration and use the network manager already controlling the interface. Keep all working IPv4 settings.
- Netplan
- NetworkManager
- Debian interfaces
Edit the active file in Check the YAML, then test with rollback available:Test IPv4 and IPv6 from a second connection before confirming. If the attempt rolls back, verify the previous settings were restored.
/etc/netplan/. Append your IPv6 address to the existing addresses list and the IPv6 default route to routes. Preserve the existing IPv4 entries and other settings.The relevant additions look like this; they are not a complete replacement file: