Change the IPv4 Address in Windows Server
Before editing Windows networking, note the IPv4 address, subnet, gateway, and DNS values from the EDBB Control Panel. Changing settings interrupts connectivity—plan a brief maintenance window.
Step 1 – Collect the New Settings
Open the Network tab
Sign in to the EDBB Control Panel and open the Network tab on your VPS. Record the IPv4 details exactly as shown.
Step 2 – Connect to the Server
- Use an RDP session if the current address is reachable.
- If the old IP is already removed, enable VNC in the quick actions and click Open Console to work from the portal console.
Step 3 – Open Adapter Properties
- Press
Win + R, typencpa.cpl, and press Enter. The Network Connections window opens. - Right-click your main adapter (typically Ethernet) and choose Properties.
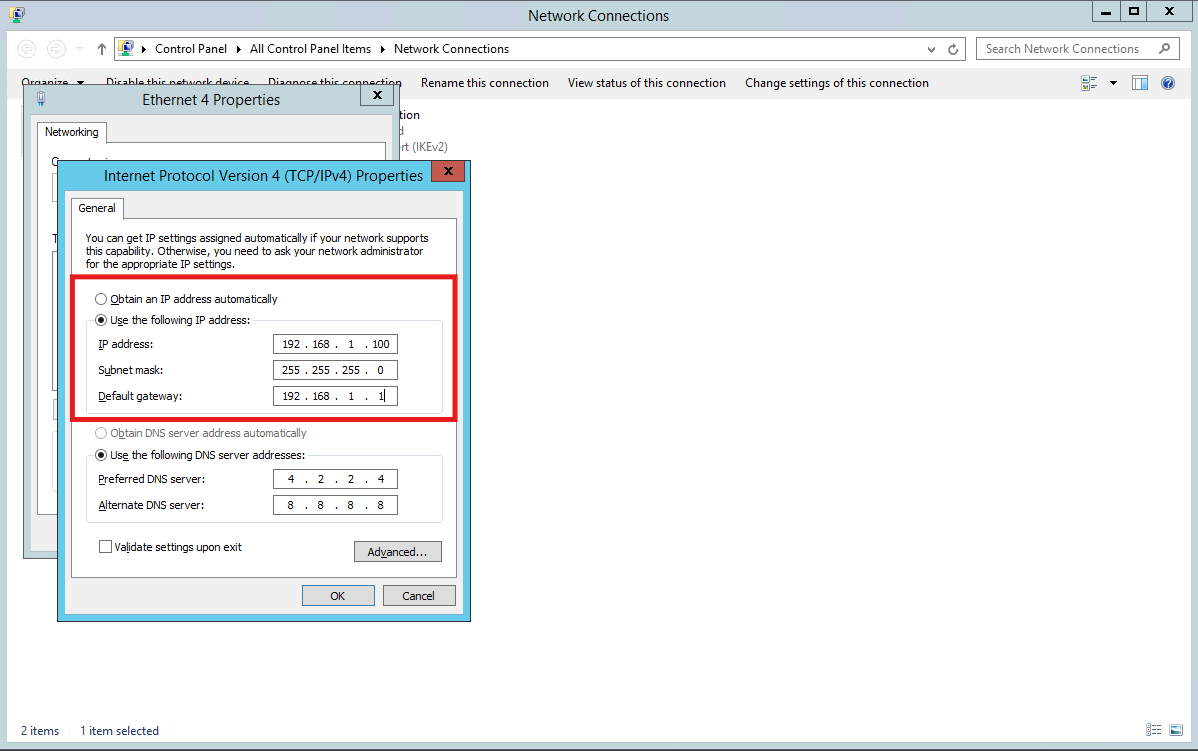
Step 4 – Enter the New IPv4 Values
- Highlight Internet Protocol Version 4 (TCP/IPv4) and click Properties.
- Select Use the following IP address and input the data from the Control Panel (IP, subnet mask, default gateway).
- If DNS servers are listed, choose Use the following DNS server addresses and add them.
Step 5 – Verify with PowerShell
Open PowerShell as Administrator and confirm the new values:Step 6 – Test Connectivity
Automation Option
Use PowerShell for scripted changes (update values before running):Final Checklist
- Update firewalls, monitoring, and documentation with the new IP.
- Restart services that bind to the old address (IIS sites, databases, etc.).
- Confirm scheduled tasks or backup jobs that reference the IP have been refreshed.