> ## Documentation Index
> Fetch the complete documentation index at: https://docs.edbb.com/llms.txt
> Use this file to discover all available pages before exploring further.
# Reset your Linux root password
> Use recovery media and the EDBB VNC console to reset a Linux root password. Check disk access, remove the recovery ISO and verify login afterward.
This recovery requires access to the VPS disk. Encrypted volumes need their recovery credentials. Confirm the target installation before changing accounts and keep a backup; do not format or reinstall a disk to reset a password.
## Reset Root Password with the Helper ISO
Every EDBB VPS ships with a password-helper ISO. Booting from it lets you assign a new root password without reinstalling the operating system; it changes account data on the disk.
***
## Before You Start
### Control Panel Access Ready
Confirm you can sign in to the
EDBB Control Panel
. All steps happen from the service Control Panel.
### Safe Maintenance Window
Plan a brief outage. The VPS reboots twice—once to load the helper ISO, once to return to disk.
### New Password Prepared
Generate a strong credential (use a password manager) so you can paste it the moment the helper prompts for input.
***
## Step 1 – Open the Control Panel
Sign in to the EDBB Control Panel, go to Services
, and select the VPS that needs a fresh root password.
Save work and shut down the operating system cleanly when possible before using a forced boot into recovery media.
***
## Step 2 – Boot from the Password Helper ISO
In the quick action column on the left, expand the red VNC Off
button and choose Enable VNC
. If you need extra guidance, see the
VNC guide
.
Switch to the Installation
tab at the top of the service view, then click the ISO Boot
sub-tab.
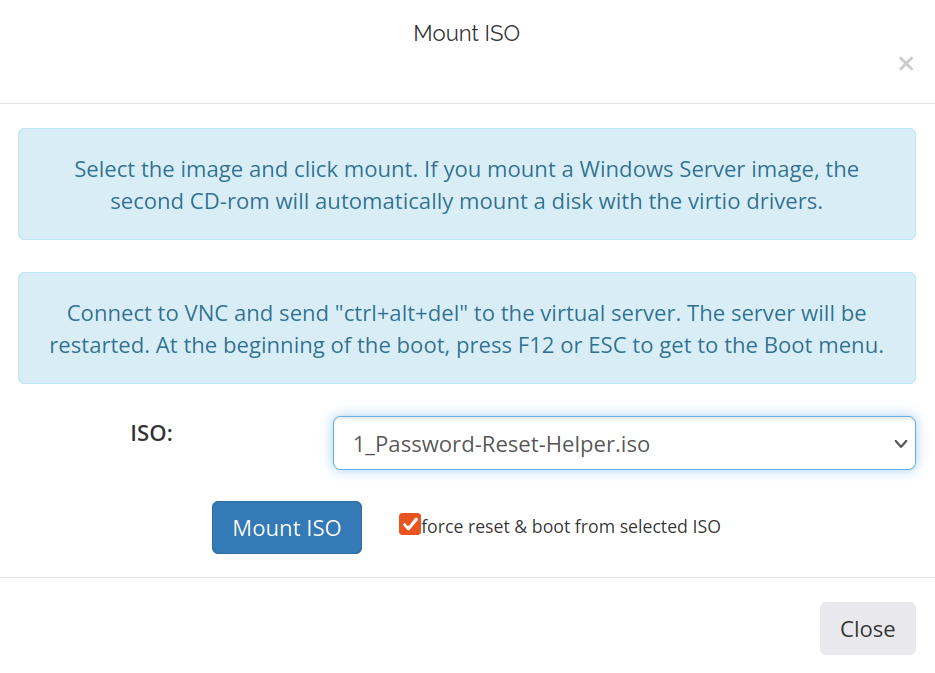
Select 1\_Password-Reset-Helper.iso
, tick Force reset & boot from the selected ISO
, and click Mount ISO
.
Launch the built-in console (or your preferred VNC client) to watch the helper boot.
 ***
## Step 3 – Set the New Root Password
1. Click inside the console window to capture the keyboard.
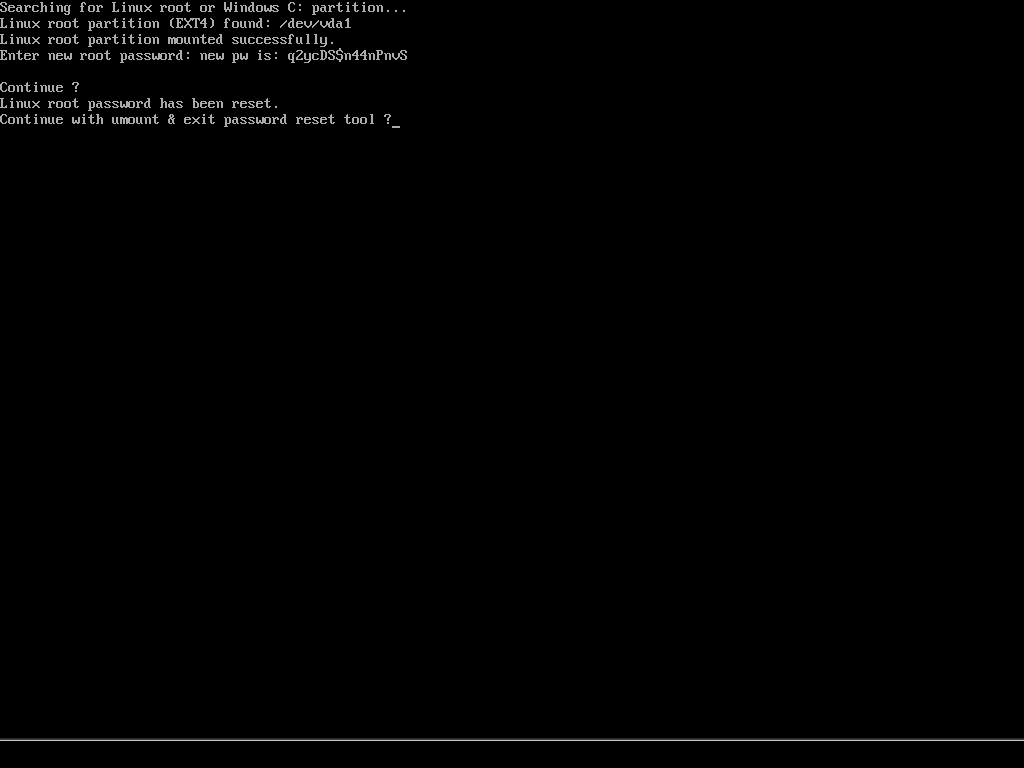
2. Wait until the helper finishes loading—you’ll see the on-screen prompt.
***
## Step 3 – Set the New Root Password
1. Click inside the console window to capture the keyboard.
2. Wait until the helper finishes loading—you’ll see the on-screen prompt.
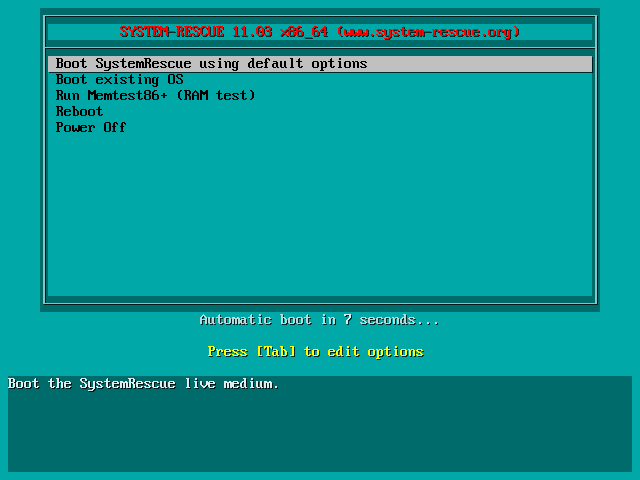 3. Enter the new root password and press **Enter**.
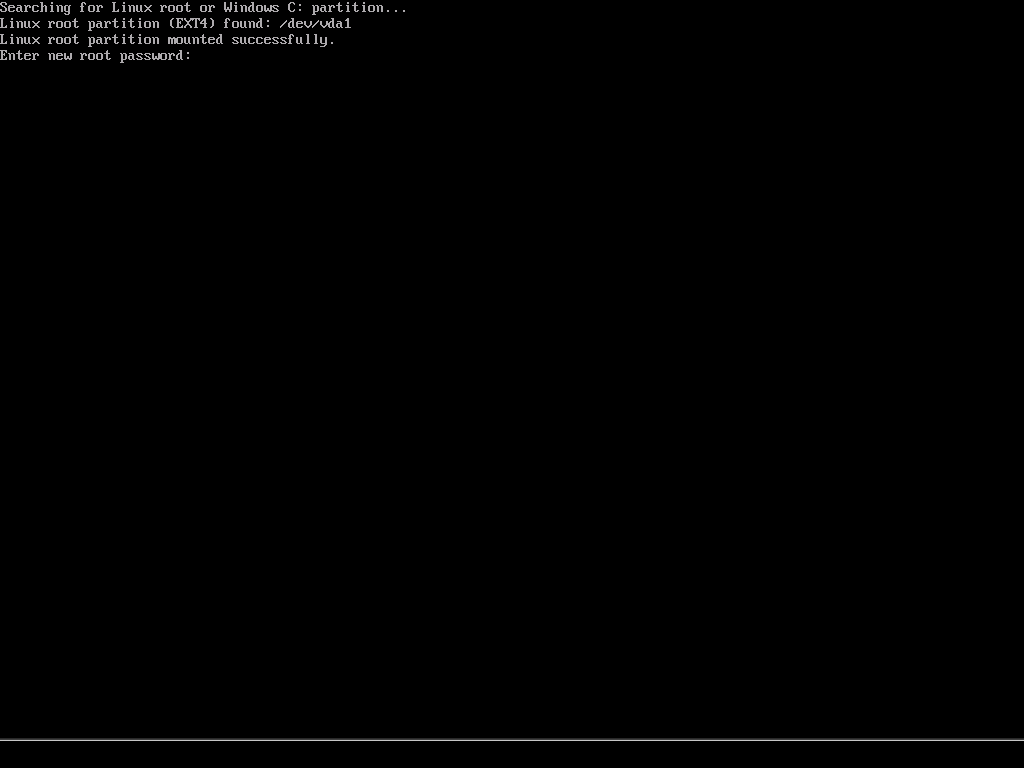 4. Re-enter the password to confirm. A success message appears.
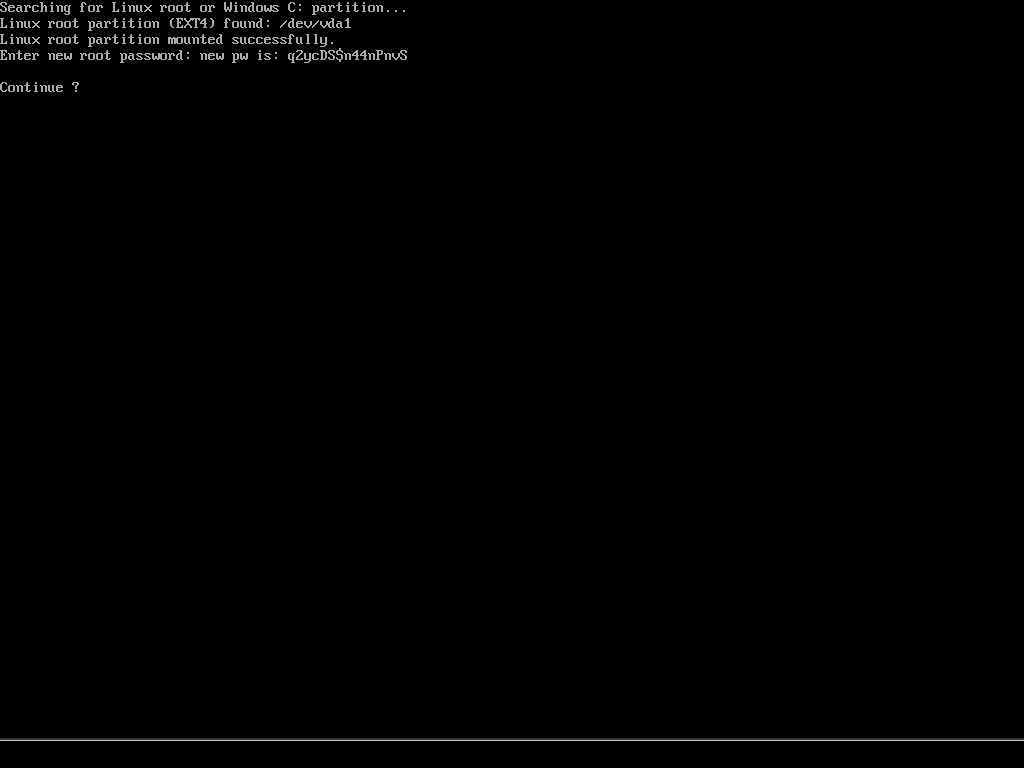 5. Press **Enter** again. The helper automatically unmounts itself and reboots the VPS from disk.
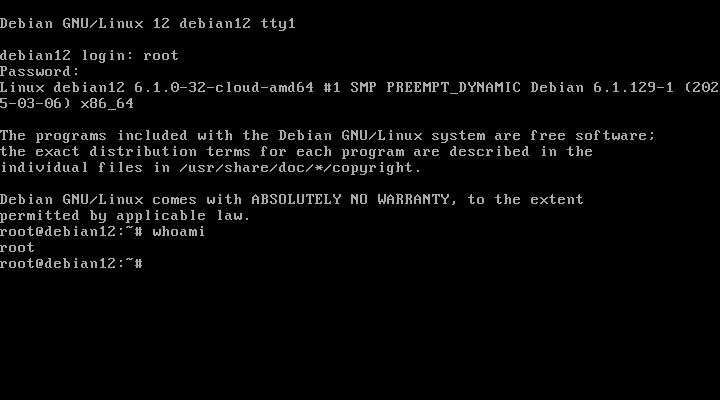
 6. Wait for the operating system to boot, then verify the changed account through the console. SSH may still disallow root or password login according to its configuration.
 Write the password to your manager immediately—EDBB does not resend credentials. Treat the helper ISO as a temporary tool; leave it mounted only while you complete the reset.
***
## Step 4 – Return to Normal Boot
Back in the Installation → ISO Boot
tab, click Unmount
so the VPS boots from disk next time.
Turn VNC back off if it is only needed for recovery.
Store the new password in your team’s password manager and share it only with trusted administrators.
***
## After resetting your password
* Replace password authentication with SSH keys once you confirm access.
* Review sudo/root accounts regularly to ensure they’re still required.
* Save the recovery steps somewhere you can reach if you lose access again.
Test a new SSH connection before closing the console.
Write the password to your manager immediately—EDBB does not resend credentials. Treat the helper ISO as a temporary tool; leave it mounted only while you complete the reset.
***
## Step 4 – Return to Normal Boot
Back in the Installation → ISO Boot
tab, click Unmount
so the VPS boots from disk next time.
Turn VNC back off if it is only needed for recovery.
Store the new password in your team’s password manager and share it only with trusted administrators.
***
## After resetting your password
* Replace password authentication with SSH keys once you confirm access.
* Review sudo/root accounts regularly to ensure they’re still required.
* Save the recovery steps somewhere you can reach if you lose access again.
Test a new SSH connection before closing the console.