> ## Documentation Index
> Fetch the complete documentation index at: https://docs.edbb.com/llms.txt
> Use this file to discover all available pages before exploring further.
# Understand the System Configuration Dialog
> Tune CPU, boot, storage, network, and display settings for your EDBB VPS using the System Configuration dialog.
## System Configuration Overview
The System Configuration dialog controls how the hypervisor presents hardware to your VPS. Changes typically require a reboot—save your work before applying them.
***
## Accessing the Dialog
Sign in to the EDBB Control Panel, open Services, and select the VPS you want to adjust.
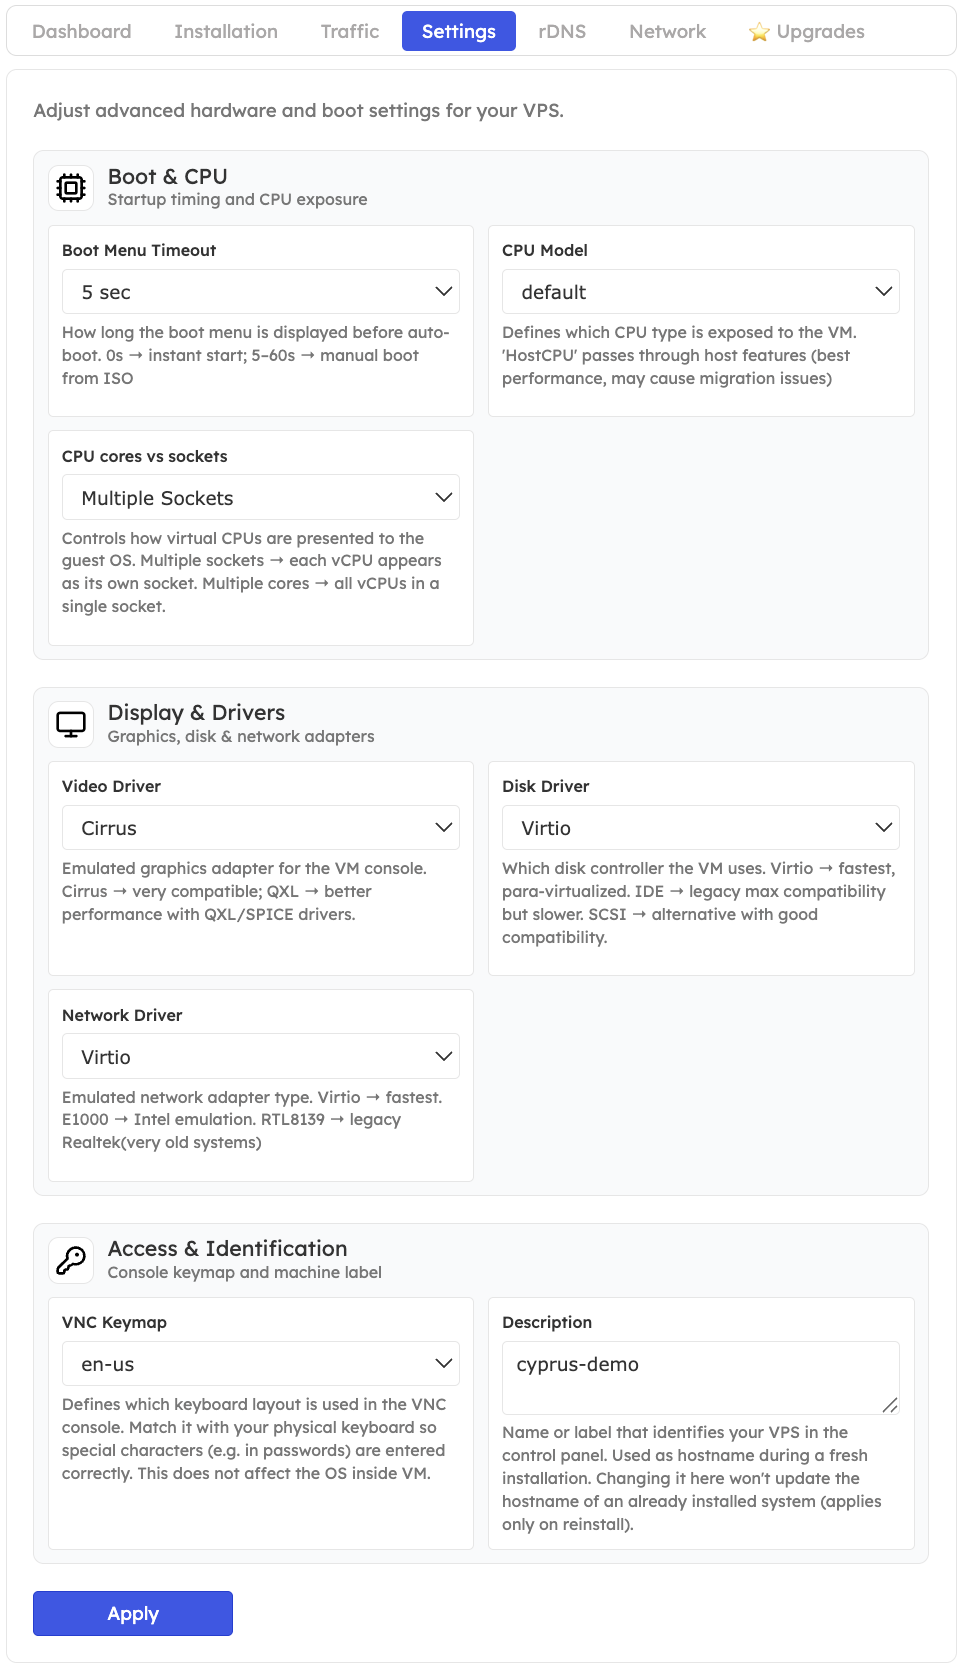
Click on the Settings tab. The dialog opens with tabs for each hardware category.
 ***
## Key Settings
Controls how long the boot menu appears at startup. 5 seconds offers a brief window to select alternate boot devices.
Choose how virtual CPUs are exposed—Multi-Core for efficiency, or Multi-Socket if legacy software requires it.
Set Host CPU Passthrough to expose advanced instruction sets unless an OS needs a more generic model.
Pick Cirrus for broad compatibility or QXL if you use SPICE-aware systems and need smoother graphics.
Virtio delivers best performance (Windows may need drivers). Use IDE for legacy guests or RouterOS.
Choose Virtio for high throughput, E1000 for broad compatibility, or RTL8139 when legacy OS support is required.
Match the console keyboard layout (e.g., en-us, de, fr) to your physical keyboard.
Add a friendly label to help identify the VPS inside the client area (e.g., prod-web-fra).
If Private VLAN is enabled, select the VLAN ID to place this VPS on an isolated network segment.
***
## 🆕 Boot Mode and TPM
The System Configuration dialog also lets you control how your VPS boots and whether a Trusted Platform Module (TPM) is available.
Choose between BIOS and UEFI firmware.
***
## Key Settings
Controls how long the boot menu appears at startup. 5 seconds offers a brief window to select alternate boot devices.
Choose how virtual CPUs are exposed—Multi-Core for efficiency, or Multi-Socket if legacy software requires it.
Set Host CPU Passthrough to expose advanced instruction sets unless an OS needs a more generic model.
Pick Cirrus for broad compatibility or QXL if you use SPICE-aware systems and need smoother graphics.
Virtio delivers best performance (Windows may need drivers). Use IDE for legacy guests or RouterOS.
Choose Virtio for high throughput, E1000 for broad compatibility, or RTL8139 when legacy OS support is required.
Match the console keyboard layout (e.g., en-us, de, fr) to your physical keyboard.
Add a friendly label to help identify the VPS inside the client area (e.g., prod-web-fra).
If Private VLAN is enabled, select the VLAN ID to place this VPS on an isolated network segment.
***
## 🆕 Boot Mode and TPM
The System Configuration dialog also lets you control how your VPS boots and whether a Trusted Platform Module (TPM) is available.
Choose between BIOS and UEFI firmware.
- BIOS: Maximum compatibility with legacy operating systems.
- UEFI: Required for modern features such as Secure Boot and newer OS releases.
Enable or disable a virtual TPM device.
- Disabled: Default, widest compatibility.
- Software TPM (vTPM): Needed for certain modern OS requirements.
***
### Default behavior
* BIOS and TPM disabled are selected by default to ensure maximum compatibility across operating systems.
***
### Important considerations
* Many operating systems are not compatible with UEFI and may fail to boot if switched.
* Some modern systems, such as Windows 11, require UEFI and TPM to install and run.
***
### How settings are applied
* Auto-installers automatically select the correct Boot Mode and TPM configuration.
* Manual configuration is mainly relevant when:
* Using custom images
* Booting from an ISO
Not sure which option to choose? In most cases, leaving the default settings unchanged is the safest approach unless your OS explicitly requires UEFI or TPM.
👉 For detailed guidance, see:\
[**UEFI vs BIOS & vTPM explained**](/vps-management/efi-vs-bios-and-tpm)
***
## Apply Changes
Adjust the relevant fields and click Apply. The dialog closes once the settings are stored.
Most hardware changes need a restart. Use the Server On menu to reboot the VPS so the new configuration takes effect.
Switching disk or network drivers can make the guest OS unbootable if drivers aren’t installed. Confirm driver support before applying changes.
You’re ready to tailor the virtual hardware for your workload while staying within the EDBB Control Panel.