> ## Documentation Index
> Fetch the complete documentation index at: https://docs.edbb.com/llms.txt
> Use this file to discover all available pages before exploring further.
# Provision EDBB VPS with Cloud-Init
> Upload a qcow2 image with Cloud-Init support, supply your user-data, and boot it via the EDBB Installation → Custom Image workflow.
## Bring Your Own Cloud-Init Image
Cloud-Init lets you boot a custom qcow2 image and execute first-boot automation (user creation, key injection, package installs) without touching the console. Make sure you keep independent backups—the upload process wipes the VPS disk.
Cloud-Init is a lightweight framework baked into many Linux templates. On first boot it reads your #cloud-config instructions, creates users, injects SSH keys, installs packages, and runs commands so the server is ready without manual steps.
***
## Why Use Cloud-Init
* **Automated onboarding** – preconfigure users, passwords, SSH keys, and services.
* **Repeatable builds** – the same image and user-data produce identical environments across regions.
* **Custom stacks** – ship bespoke templates or vendor images instead of the standard automated installers.
***
## Prepare Your Image
Export a qcow2 disk that already includes Cloud-Init. Remove SSH host keys and temporary data so the instance generates fresh credentials on first boot.
Keep your #cloud-config YAML handy. You’ll paste it in Expert mode if you want to run custom tasks on first boot.
Confirm the image boots locally and note its checksum. This helps you detect corruption before uploading and keeps reinstalls predictable.
***
## Upload - Provision (Existing VPS)
Sign in to the EDBB Control Panel, choose your VPS, and switch to the Installation tab.
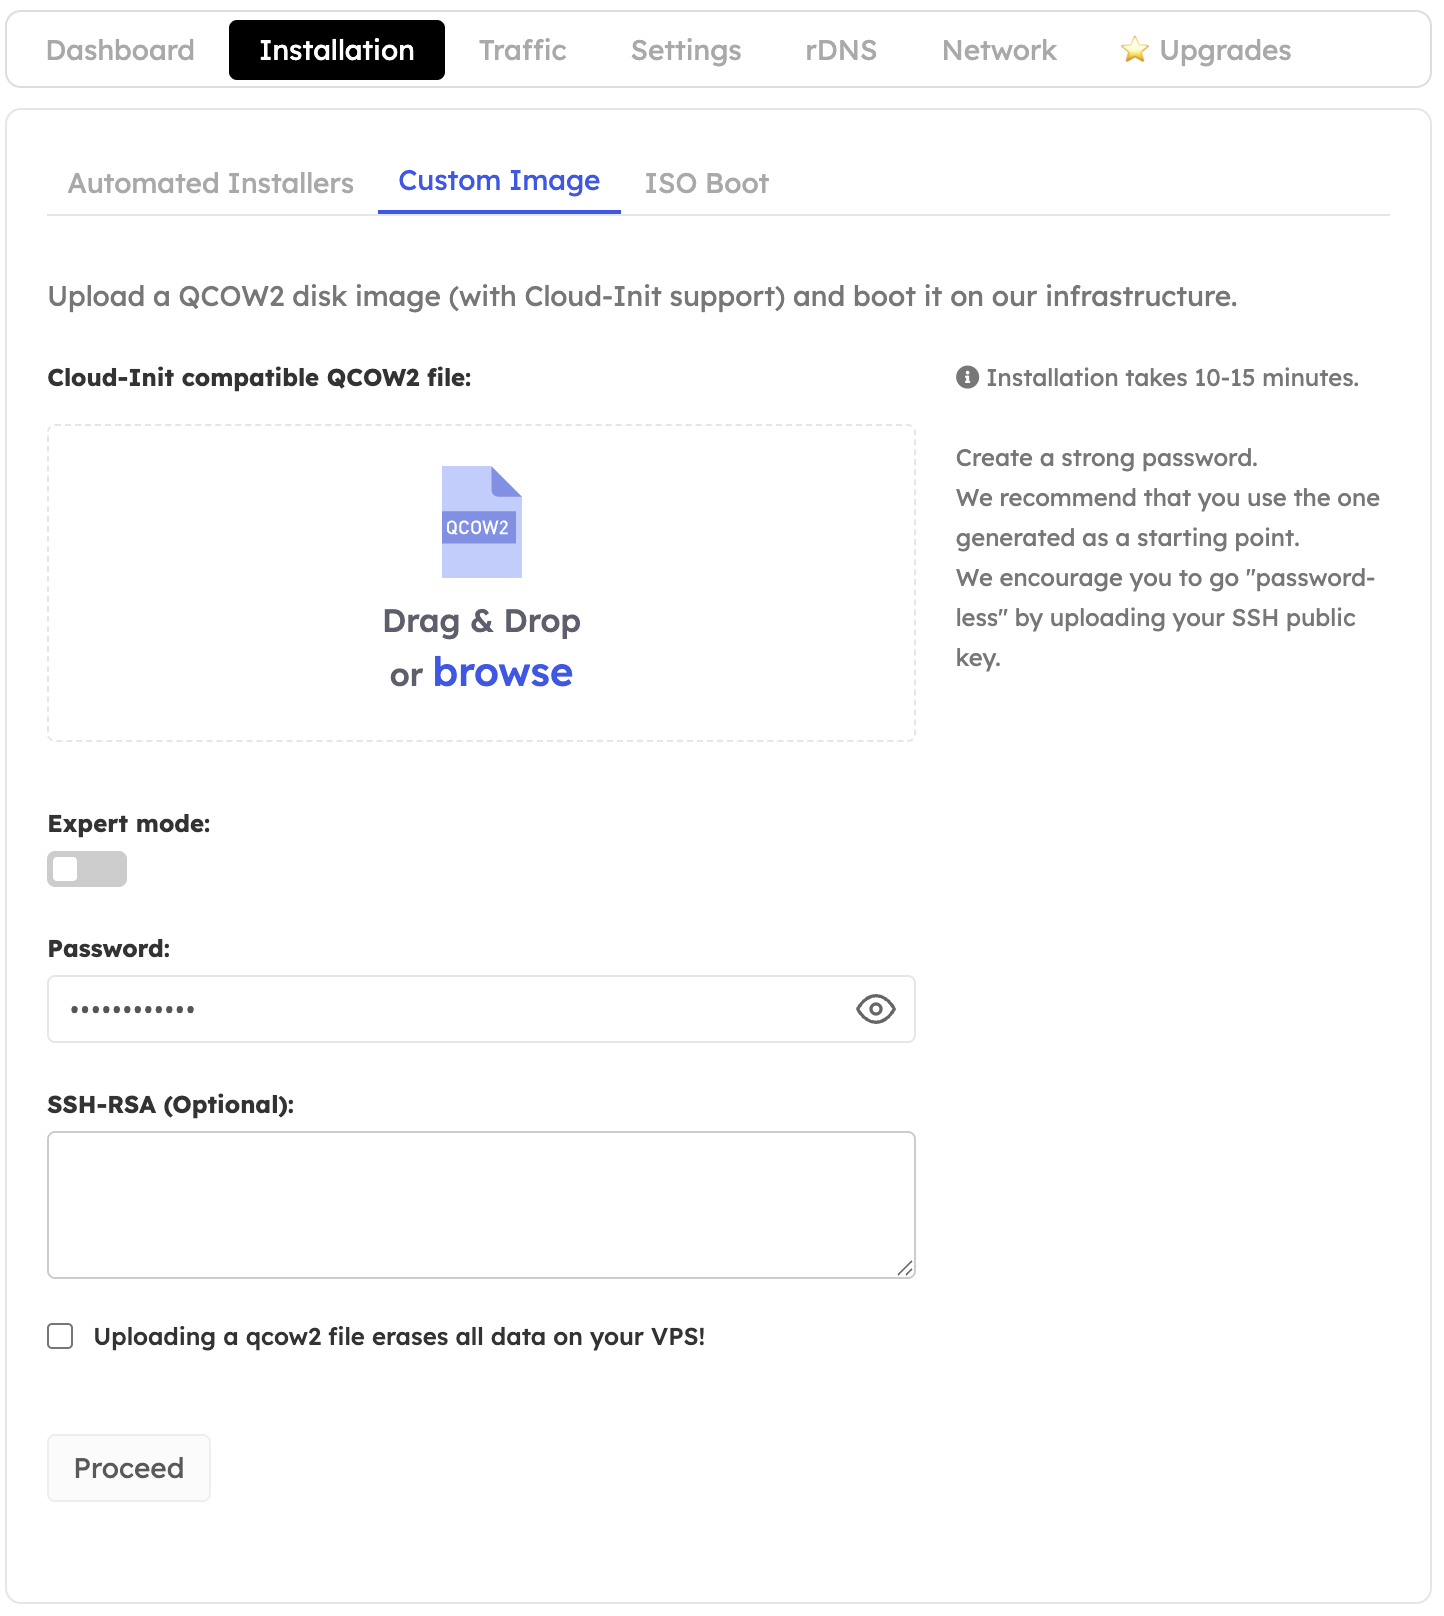
Choose the Custom Image sub-tab to reveal the Cloud-Init upload interface.
Drag & drop your qcow2 (or click browse). The Control Panel stores the image temporarily for this reinstall.
Toggle Expert mode if you want to paste Cloud-Init user-data or SSH keys. Supply a strong password—or rely on keys only—and tick the confirmation acknowledging that the disk will be erased.
Click Proceed. The VPS is rebuilt from your qcow2 image and executes the supplied Cloud-Init directives on first boot.
Uploading a qcow2 image removes the existing disk content permanently. Keep an external backup and verify the checksum of your image before you begin.
***
## Sample `cloud-config`
```yaml theme={"system"}
#cloud-config
users:
- default
- name: deploy
groups: sudo
shell: /bin/bash
ssh_authorized_keys:
- ssh-ed25519 AAAAC3NzaC1lZDI1NTE5AAAAIExampleKeyHere
package_update: true
package_upgrade: true
packages:
- nginx
- fail2ban
write_files:
- path: /etc/motd
permissions: "0644"
owner: root:root
content: |
Welcome to your automated VPS!
runcmd:
- [systemctl, enable, --now, nginx]
- [ufw, allow, "OpenSSH"]
power_state:
mode: reboot
```
***
## Validate - Troubleshoot
* Run `sudo cloud-init status --wait` after first boot to confirm success.
* Check `/var/log/cloud-init.log` for detailed logs if tasks fail.
* Re-upload a revised image or update the YAML and rerun the installation if you need adjustments.
***