> ## Documentation Index
> Fetch the complete documentation index at: https://docs.edbb.com/llms.txt
> Use this file to discover all available pages before exploring further.
# Upgrade to a Higher VPS Plan
> Scale your EDBB VPS to the next tier, add more resources instantly, and understand billing, timing, and post-upgrade steps.
export const CtaButton = ({label, link, openInNewTab}) =>
{label}
;
# Upgrade a VPS Plan in Minutes
Plan upgrades swap your current VPS for a larger predefined tier—more vCPU, RAM, disk, and monthly traffic—without reinstalling or changing the IP address.
## Why Upgrade
* Add CPU, memory, and disk space in one step.
* Boost the monthly traffic allowance tied to the plan.
* Keep your data intact; the upgrade happens in-place.
Upgrades are prorated. You pay only the price difference for the remaining days in your billing cycle.
***
## Option 1 — Use the Quick Upgrade Card
If you already know which tier you need, click the upgrade shortcut on the service Control Panel.
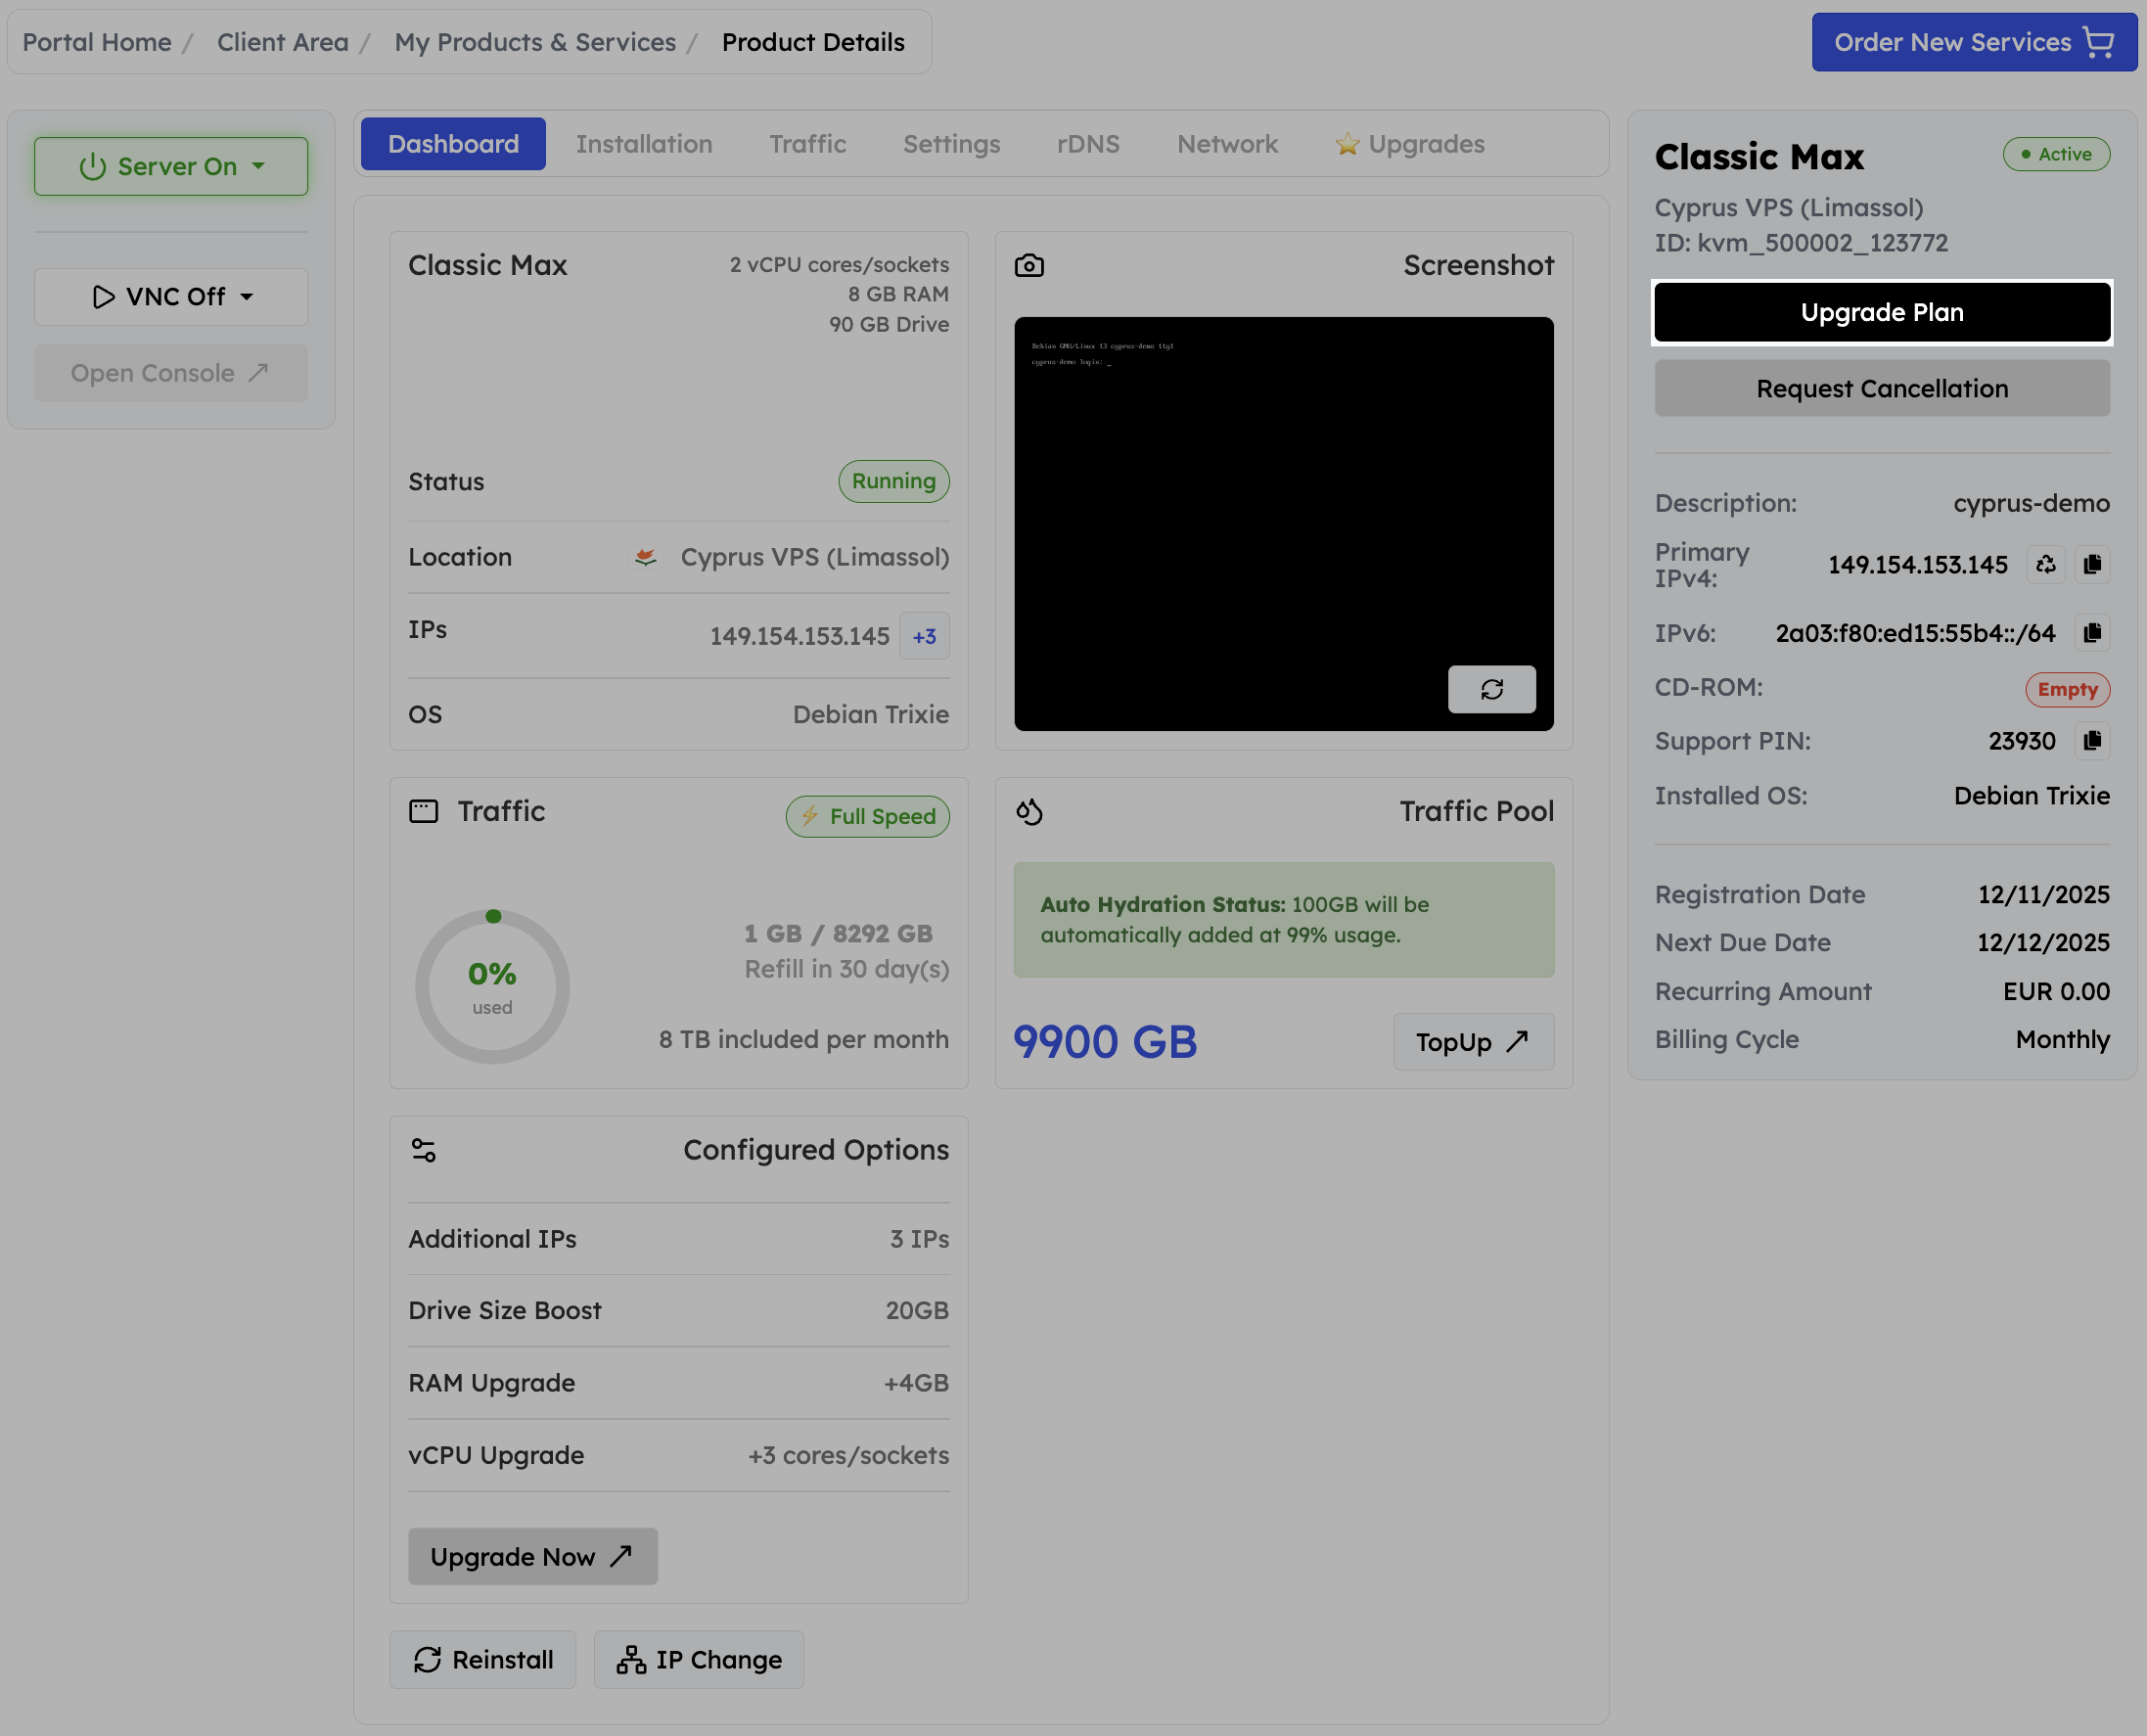 Sign in to the EDBB Control Panel and choose the service you want to scale.
Hit the green Upgrade button in the right-hand column. You’ll land on the plan comparison page that lists every tier above your current one.
Pick the higher plan, review the prorated amount, and pay the invoice. Once the payment clears, the upgrade finalises automatically.
***
## Option 2 — Order from the Upgrade Tab
Need to compare plan details first? Use the dedicated Upgrade tab.
Sign in to the EDBB Control Panel and choose the service you want to scale.
Hit the green Upgrade button in the right-hand column. You’ll land on the plan comparison page that lists every tier above your current one.
Pick the higher plan, review the prorated amount, and pay the invoice. Once the payment clears, the upgrade finalises automatically.
***
## Option 2 — Order from the Upgrade Tab
Need to compare plan details first? Use the dedicated Upgrade tab.
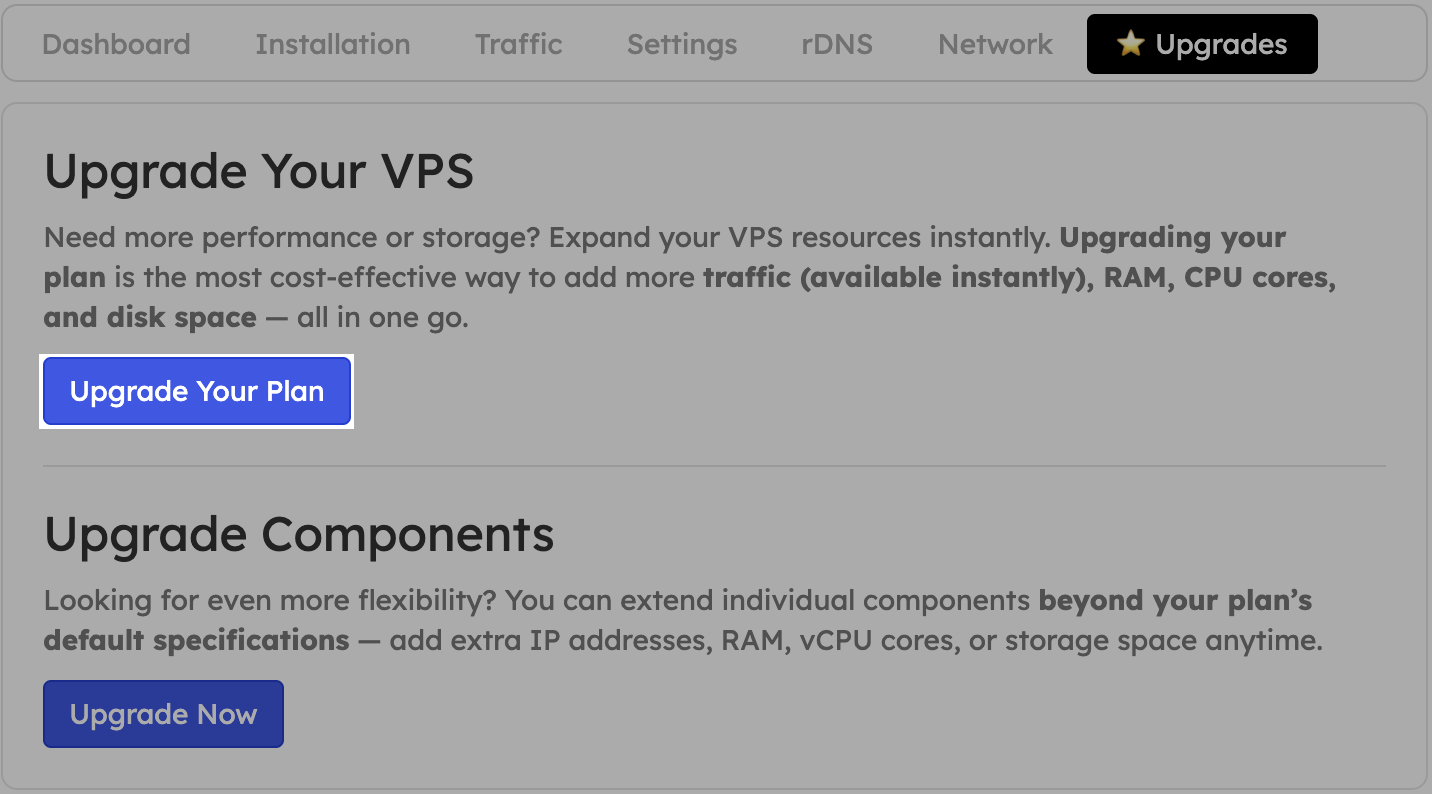 In the service view, click Upgrade in the tabs bar.
Press the blue Upgrade Plan button. This loads the comparison page that lists each higher tier with resource details.
Compare CPU, RAM, storage, and traffic quotas. Select your target plan, pay the prorated invoice, and the Control Panel handles the rest.
Upgrades trigger a short reboot so the new resources can load. Save work inside the OS before confirming the change.
***
## After the Upgrade
* **IP & data** stay the same—no migration is required.
* **RAM & vCPU** are available after a cold reboot of the VPS.
* **Disk size** increases, but filesystems and partitions are untouched; expand them manually if you want to use the extra space.
* **Traffic allowance** increases immediately.
Need granular resource changes instead? Use Upgrade Components.
***
## Need Even More Traffic
Top up your traffic pool to share data transfer across services. Auto-hydration can refill VPS traffic automatically when it nears 99% usage.
In the service view, click Upgrade in the tabs bar.
Press the blue Upgrade Plan button. This loads the comparison page that lists each higher tier with resource details.
Compare CPU, RAM, storage, and traffic quotas. Select your target plan, pay the prorated invoice, and the Control Panel handles the rest.
Upgrades trigger a short reboot so the new resources can load. Save work inside the OS before confirming the change.
***
## After the Upgrade
* **IP & data** stay the same—no migration is required.
* **RAM & vCPU** are available after a cold reboot of the VPS.
* **Disk size** increases, but filesystems and partitions are untouched; expand them manually if you want to use the extra space.
* **Traffic allowance** increases immediately.
Need granular resource changes instead? Use Upgrade Components.
***
## Need Even More Traffic
Top up your traffic pool to share data transfer across services. Auto-hydration can refill VPS traffic automatically when it nears 99% usage.